
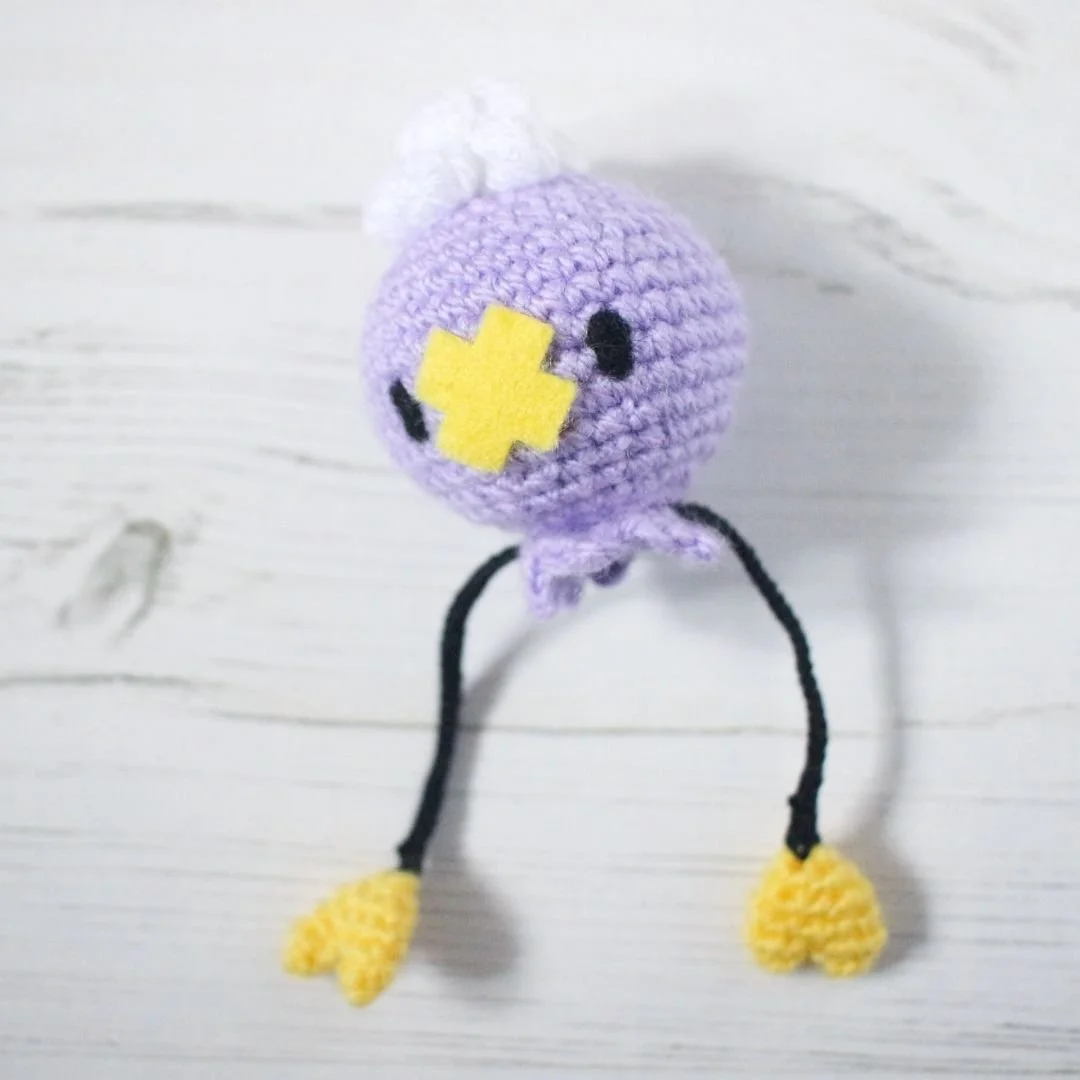
Drifloon Amigurumi Pattern
YARN & HOOK
2mm hook & 1mm hook
Stylecraft Special DK in Wisteria, Citron and White
Yellow felt
Black embroidery floss
Polyester toy filling
Pins to place pieces before sewing together
Darning needle
Stitch markers (I prefer using scrap yarn as “stitch markers”)
Fibres in Black for needle felting*
Needle felting tool*
* Please note that I have used needle felting to create the eyes. Needle felting is still quite new to me so I will not be including instructions on how to do this. You may want to look into alternative ways of creating the eyes – like cut out felt pieces or safety eyes.
SIZE
Drifloon is approximately 6 cm long, 12 if you include the dangly arms.Weight: 15grams (this includes all materials used to make Drifloon)
STITCHES & ABBREVIATIONS – UK ENGLISH
ch chain
dc double crochet
tr treble
bobble stitch 4 tr in the same st, remove hook from loop, insert hook into top of first tr made, put loop back on hook and pull through to create a bobble.
sl st slip stitch
st/sts stitch/es
inc dc 2 in one st
dec decrease; insert hook in the front loop of the next two sts, yarn over, pull through both loops, y.o. and pull through remaining two loops –> one dc placed into two sts
ws wrong side
rs right side
ASSEMBLY
Assemble in the same order the pattern is written. I would recommend using a photo of Drifloon as reference for best possible outcome. Pin all the pieces in place before sewing to make sure it looks right, including the felt pieces - Once all the crocheted pieces are attached use fabric glue to attach the felt pieces.
THE PATTERN
HEAD & BODY
Yarn: Wisteria
Round 1: dc 6 in Magic Ring (6)
R2: inc in all sts around (12)
R3: (dc, inc) x 6 (18)
R4: (dc, inc, dc) x 6 (24)
R5: dc 24
R6: (dc 3, inc)x 6 (30)
R7: (dc 2, inc, dc2) x 6 (36)
R8-12: dc 36
R13: (dc 2, dec, dc 2) x 6 (30)
R14: (dc 3, dec) x 6 (24)
R15: dc 24
R16: (dc, dec, dc) x 6 (18)
Stuff firmly. Before we move on I just wanted to check in… Are you reading this somewhere other than www.loopycathrine.com? Did you pay for it? Then you have been dooped. This is a free pattern on the above mentioned website only. Please head over there and let me know where you found it, report the seller on the platform you purchased the pattern and claim your money back. Thank you!
R17: (dec, dc) x 6 (12)
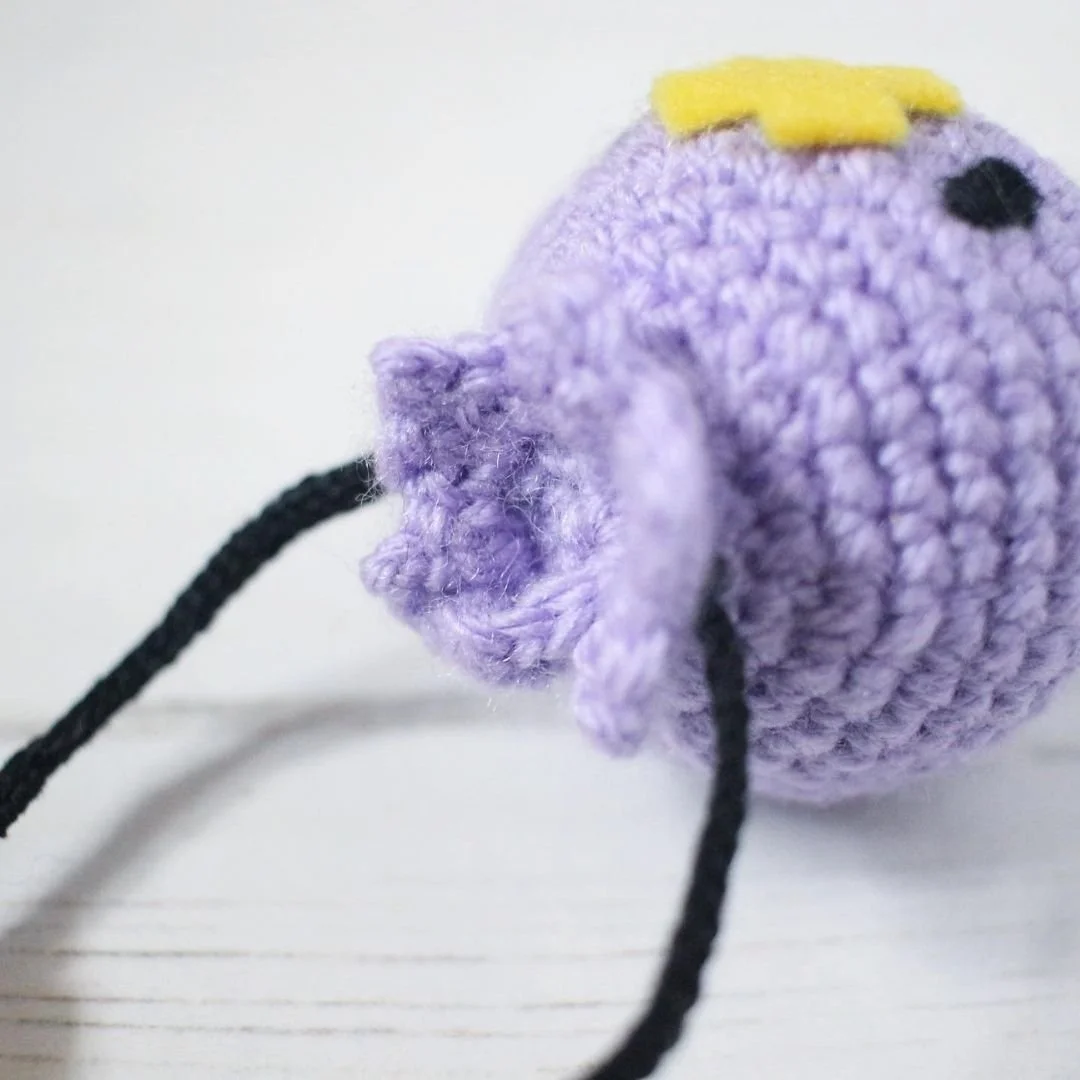
R18: working in the backloops only: (skip 1 back loop, dc in the next back loop) x 6 (6dc)
Do not fasten off just yet – we will now work in the front loops to create the frills at the bottom of Drifloon’s body:
R18: working in the front loops that were left unworked in the previous round: (tr, ch2, sl st in the second ch from hook, tr) in the first front loop, dc in the next front loop – repeat around all front loops, in total 6 times.
Fasten off. Weave in loose end in the middle 6 dcs by inserting darning needle in the front loop of each st and pull tight to close the hole.

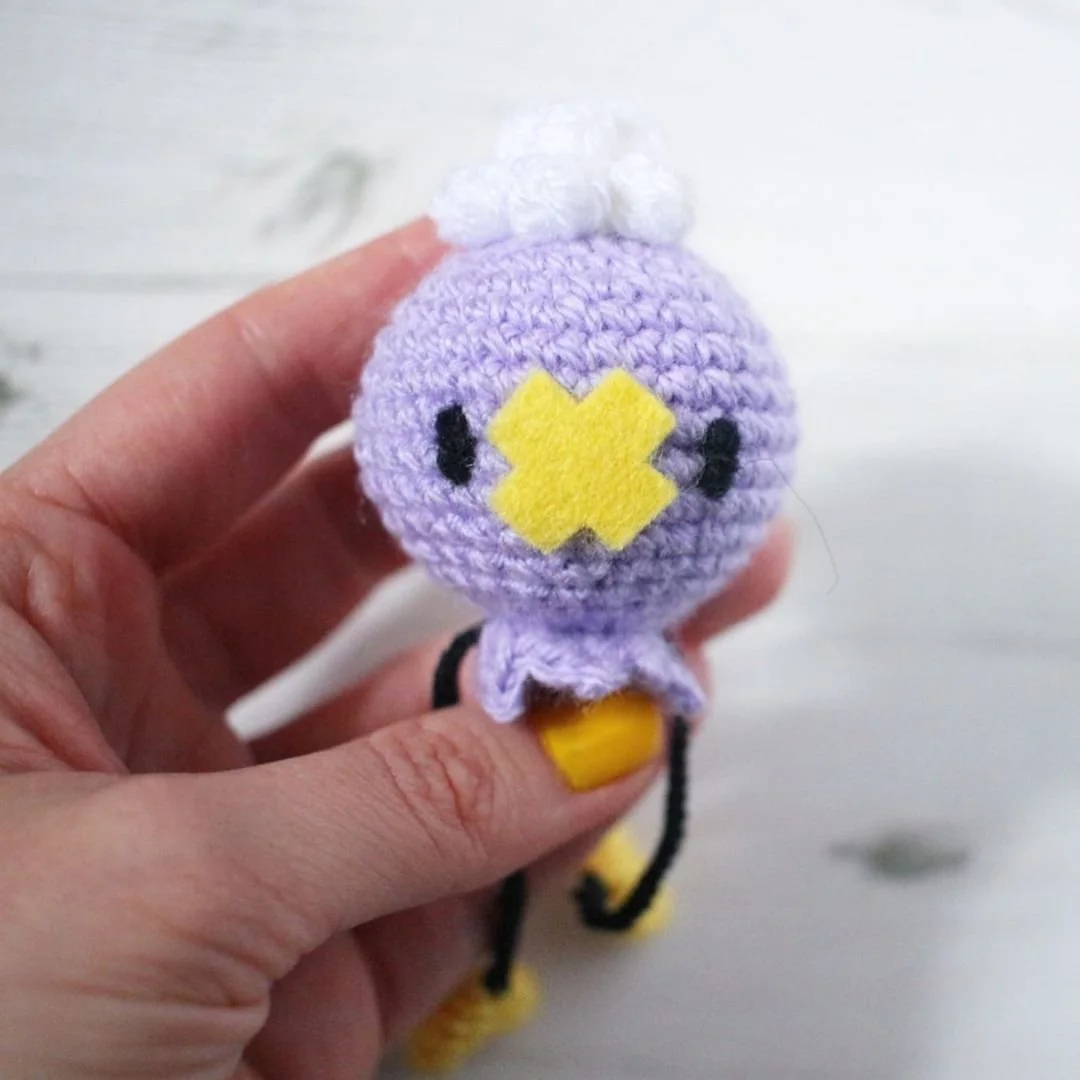
BOBBLY HEAD PIECE
Yarn: White
Note that this piece is worked in rows from the bottom up, and due to the decreases used the sides will naturally curve towards each otherch 16
Row 1 (rs): (dc, bobble st, dc) x 5 (15)
R2 (ws): skip the fist st, dec x 7 until the end of the row (7)
R3 (rs): (dc, bobble st) x 3, dc in the last st (7)
Fasten off and leave long end for sewing together both sides and attach to the top of Drifloos head.
DANGLY ARMS/LEGS
Yarn: Citron
Embroidery gloss: Black
Make 2
First pick up your Citron yarn and your 2mm hook to create the heart shaped hands (are they hands or feet?!). There aren’t many rounds in this piece, so it can get a little bit awkward to crochet.
Round 1: dc 4 in Magic Ring (4)
R2: inc in all sts around (8)
R3: (dc 3, inc) x 2 (10)
R4: dc 5, skip the remaining 5 sts of this round – the bottom of Drifloons hands are split into two, so that’s what we’re creating now
R5: and dc 4 in the first sts
Fasten off. Weave in loose end by inserting darning needle in the front loop of each st and pull tight to close the hole.We will now make the second side side:
R4: sl st into the first unworked st (st number 6), dc in the same dc, and dc in the remaining 4 sts.
R5: dc 5
Fasten off. Weave in loose end by inserting darning needle in the front loop of each st and pull tight to close the hole.
Using your 1mm hook and Black embroidery floss attach to the magic ring, and ch approximately 30 chs, take the loop off the hook, insert hook into a stitch into Drifloon’s side between the body and the frills. Put the loop pack on hook. Sl st in each chain all the way back to the heartshaped piece.
Fasten off and weave in loose ends.
FACE - FELT & NEEDLE FELTING
Using Yellow felt, cut out a bold X and attach to the middle with glueI didn’t have any nice small, oval safety eyes, so I chose to use black fibre and needle felt the oval eyes on either side of the X
THANK YOU & ENJOY!
Please do not reprint, sell or claim the pattern as your own.
I’ve loved creating this pattern so please don’t forget to credit the pattern designer.
I would love to see your creations! Please remember to tag me in your social media posts and use the following hashtag #loopycathrineamigurumi
For any questions about the pattern, please comment below and I will do my best to help.