
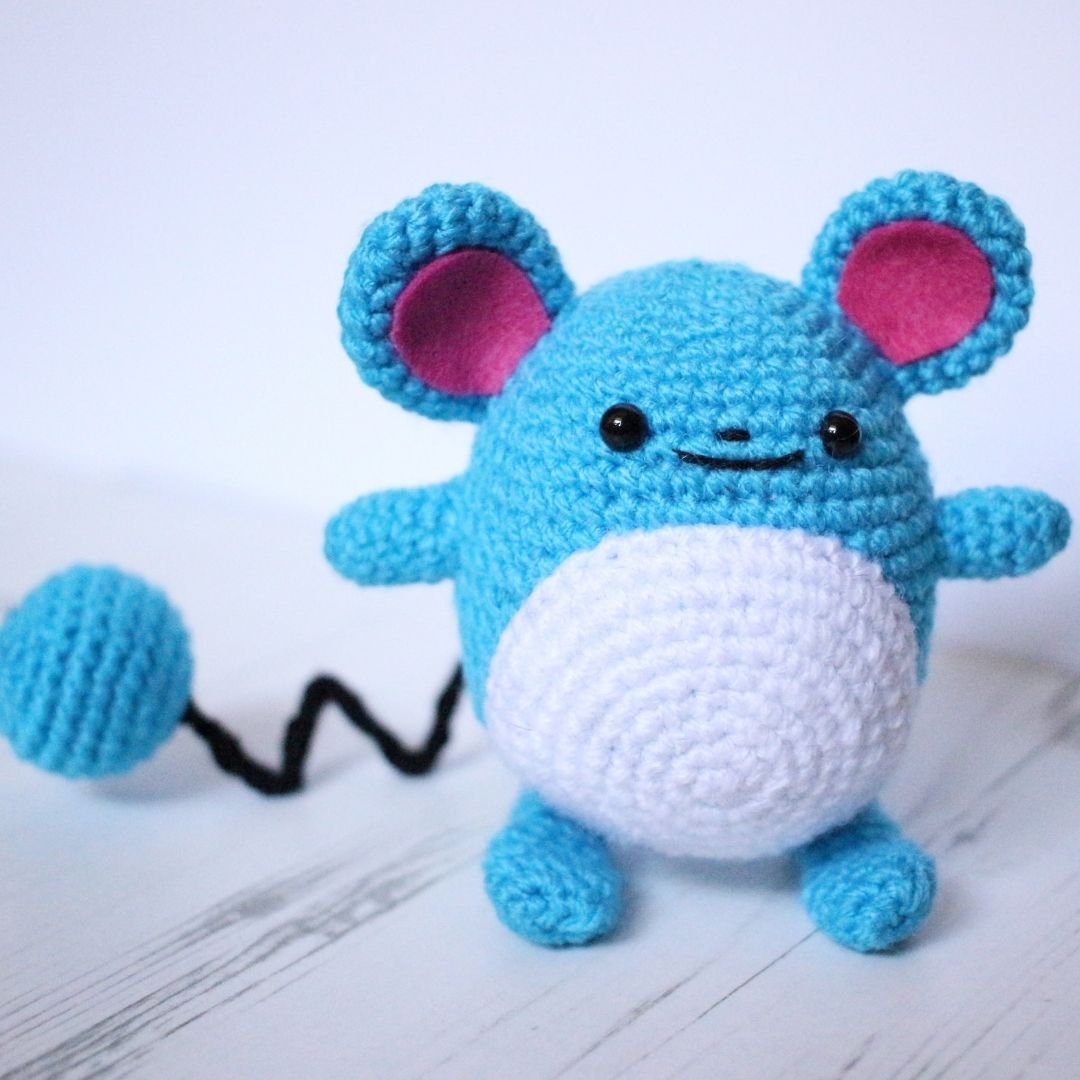
Marill Amigurumi Pattern

YARN & HOOK
2mm hook
Stylecraft Special DK in Turquoise, White, and Black
Black embroidery floss
6mm black safety eyes
Pink felt
2 x Black pipe cleaner (One for the tails. And one for the feet)
Polyester toy filling
Pins to place pieces before sewing together
Darning needle
Stitch markers (I prefer using scrap yarn as “stitch markers”)
STITCHES & ABBREVIATIONS – UK ENGLISH
dc double crochet
sl st slip stitch
st/sts stitch/es
inc dc 2 in one st
dec decrease; insert hook in the front loop of the next two sts, yarn over, pull through both loops, y.o. and pull through remaining two loops –> one dc placed into two sts
ASSEMBLY
Assemble in the order of the below pieces. If possible I would recommend using a photo of Marill as reference for best possible outcome.
THE PATTERN
THE BODY
Yarn: Turquoise
Round 1: dc 6 in Magic Ring (6)
R2: Inc in all sts around (12)
R3: (dc, inc) x 6 (18)
R4: (dc 2, inc) x 6 (24)
R5: (dc 3, inc) x 6 (30)
R6: (dc 9, inc) x 3 (33)
R7: (dc 10, inc) x 3 (36)
R8: (dc 11, inc) x 3 (39)
R9: (dc 12, inc) x 3 (42)
R10: (dc 13, inc) x 3 (45)
R11: (dc 14, inc) x 3 (48)
R12-21: dc 48
Attach the safety eyes between round 9 & 10.
Use the black embroidery floss to sew on mouth and nose. I like to secure the thread by tying it together twice on the inside.
R22: (dc 14, dec) x 3 (45)
R23: (dc 13, dec) x 3 (42)
R24: (dc 5, dec) x 6 (36)
R25: (dc 4, dec) x 6 (30)
Start stuffing the body with polyester toy filling. Before we move on I just wanted to check in… Are you reading this somewhere other than www.loopycathrine.com? Did you pay for it? Then you have been dooped. This is a free pattern on the above mentioned website only. Please head over there and let me know where you found it, report the seller on the platform you purchased the pattern and claim your money back. Thank you!
R26: (dc 3, dec) x 6 (24)
R27: (dc 2, dec) x 6 (18)
R28: (dc 1, dec) x 6 (12)
Final stuffing opportunity if you want to make the body a little bit firmer.
R29: (dec) x 6 (6)
Fasten off and sew in loose end.
WHITE BELLY PIECE
Yarn: White
The increases in this piece are placed more randomly in each section of a round than normal to make the piece a little more round. I find that using regular increases create a bit of a "hexagon look" which I wanted to avoid.
Round 1: dc 6 in Magic Ring (6)
R2: Inc in all sts around (12)
R3: (dc, inc) x 6 (18)
R4: (dc, inc, dc) x 6 (24)
R5: (inc, dc 3) x 6 (30)
R6: (dc 3, inc, dc) x 6 (36)
R7: (dc 2, inc, dc 3) x 6 (42)
R8: (inc, dc 6) x 6 (48)
R9: dc 32 - leaving the remaining 16 dc of the round unworked. These should be facing down when attaching the piece to the body)
Fasten off and leave long end for sewing. Attach piece to body.
EARS
Yarn: Turquoise
Make 2
Round 1: dc 6 in Magic Ring (6)
R2: Inc in all sts around (12)
R3: (dc, inc) x 6 (18)
R4- 7: dc 18
R8: (dc 4, dec) x 3 (15)
R9: (dc 3, dec) x 3 (12)
Fasten off and leave long end for sewing. Attach pieces to body.
ARMS
Yarn: Turquoise
Make 2
Round 1: dc 4 in Magic Ring (4)
R2: Inc in all sts around (8)
R3-6: dc 8
Fasten off and leave long end for sewing. Attach pieces to body.
FEET
Yarn: Turquoise
Make 2
ch 3 - we will be working around the top and bottom of these chains
Round 1: dc in second ch from hook, inc in next stitch, dc in the other side of ch, inc in second ch (6)
R2: (inc, inc, dc) x 2 (10)
R3-5: dc 10
R6: (dec, dc 3) x 2 (8)
R7-9: dc 8
We will now continue to make the heel:
R10: dc 1, turn
R11 (Row): ch1, dc 4 (turn)
R12: ch1, dc 4, - we are now working in rounds again so keep going without turning: - dec in side of row and next dc from previous round, dc 2, dec in next dc and side of next row
R13: dc 8Fasten off and leave long end for sewing.
Please have a look at the pattern for Jigglypuff for further instructions on how I used wire to make the feet a little sturdier.
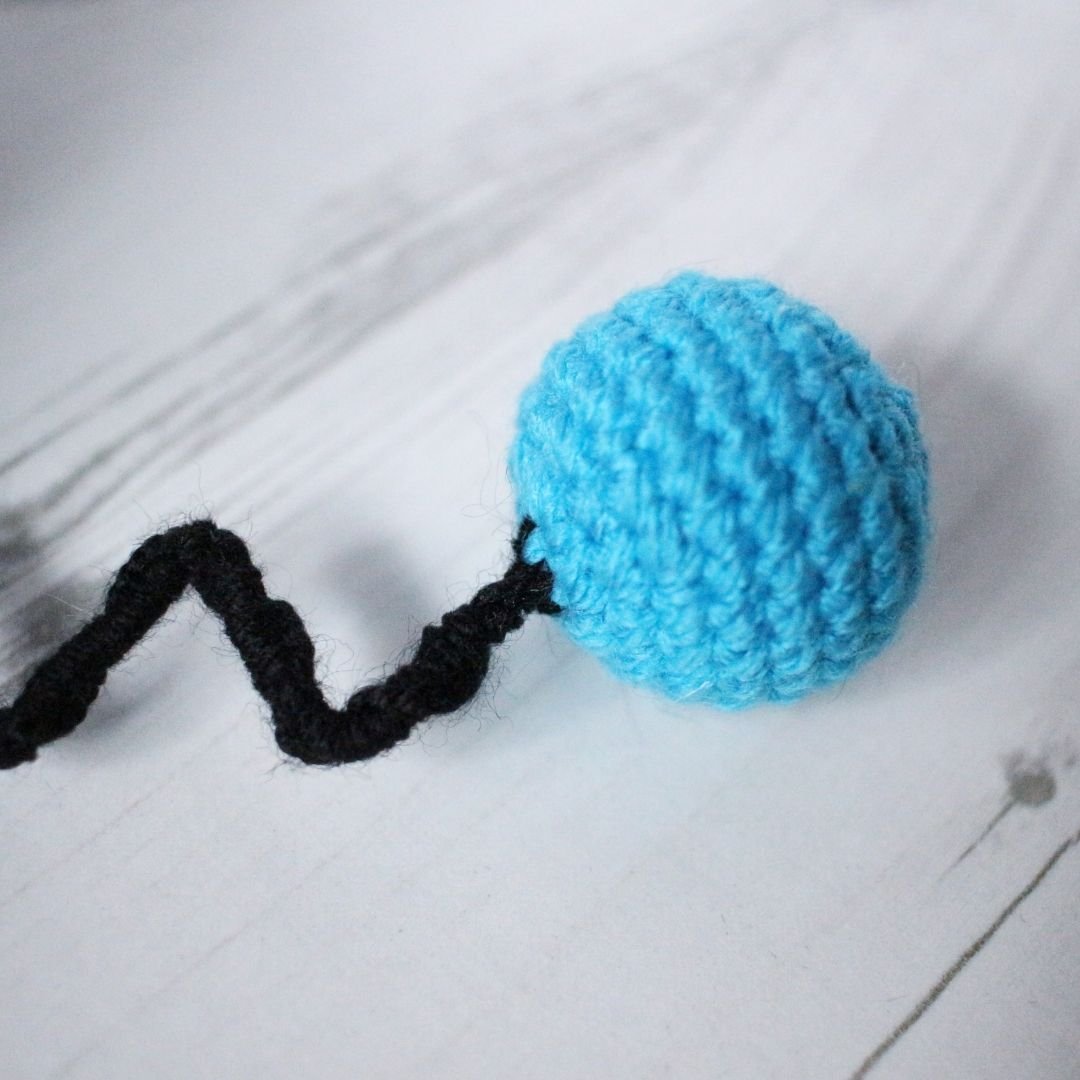
TAIL BALL
Yarn: Turquoise
Round 1: dc 6 in Magic Ring (6)
R2: Inc in all sts around (12)
R3: (dc, inc) x 6 (18)
R4: (dc 2, inc) x 6 (24)
R5-8: dc 24
R8: (dc 2, dec) x 6 (18)
R9: (dc, dec) x 6 (12)
R10: (dec) x 6 (6)
Fasten off and weave in end.
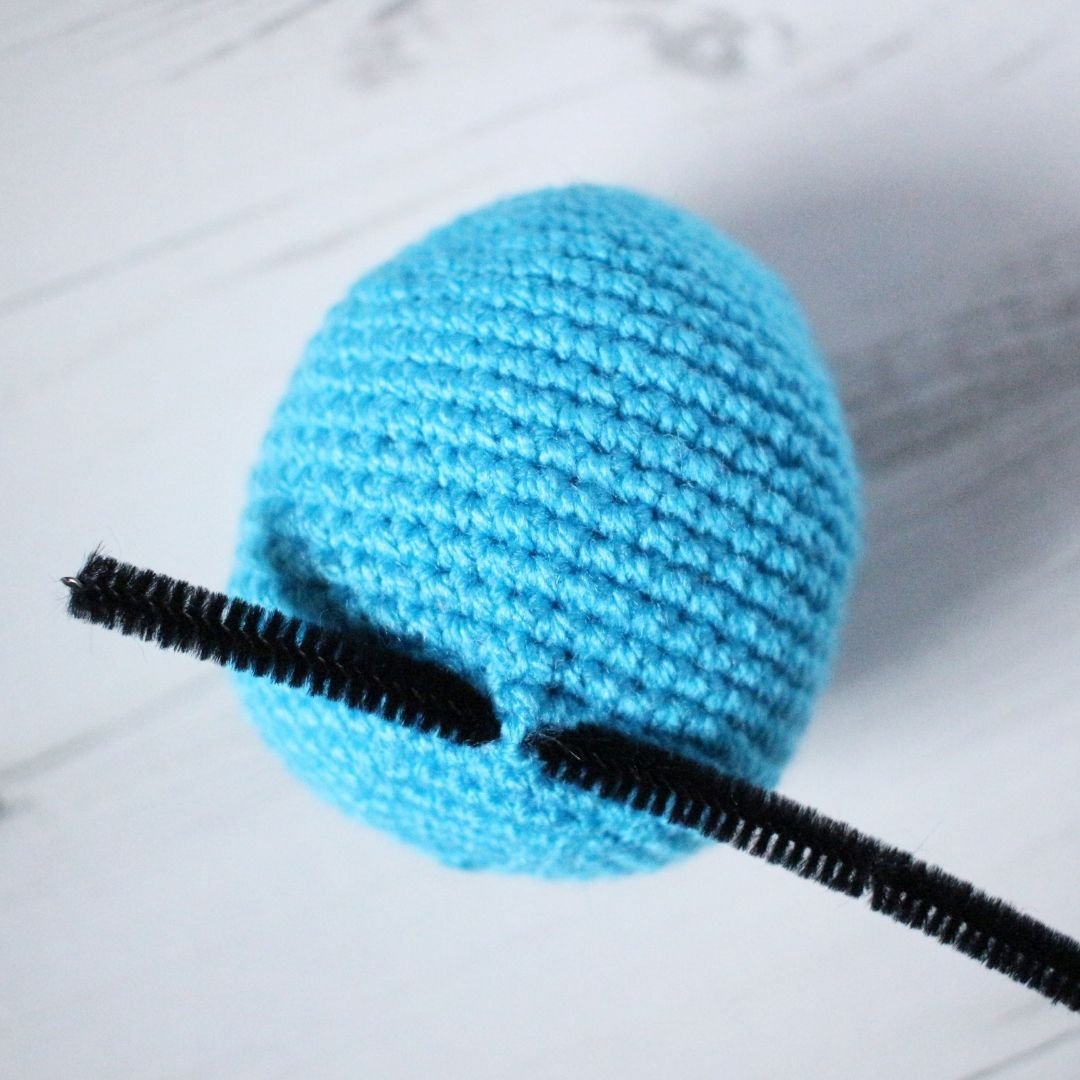
TAIL
Yarn: Turquoise
Pipe cleaner / wire
I tried several different methods of making the tail. But crocheting it just didn't have the effect I wanted. Then I remembered I used to make spiral knot friendship bracelets when I was a kid and thought I would give that a go - along with a pipe cleaner - and it worked! If the below instructions aren't detailed enough please google "spiral knot bracelet" and you should find various video instructions that might clarify.
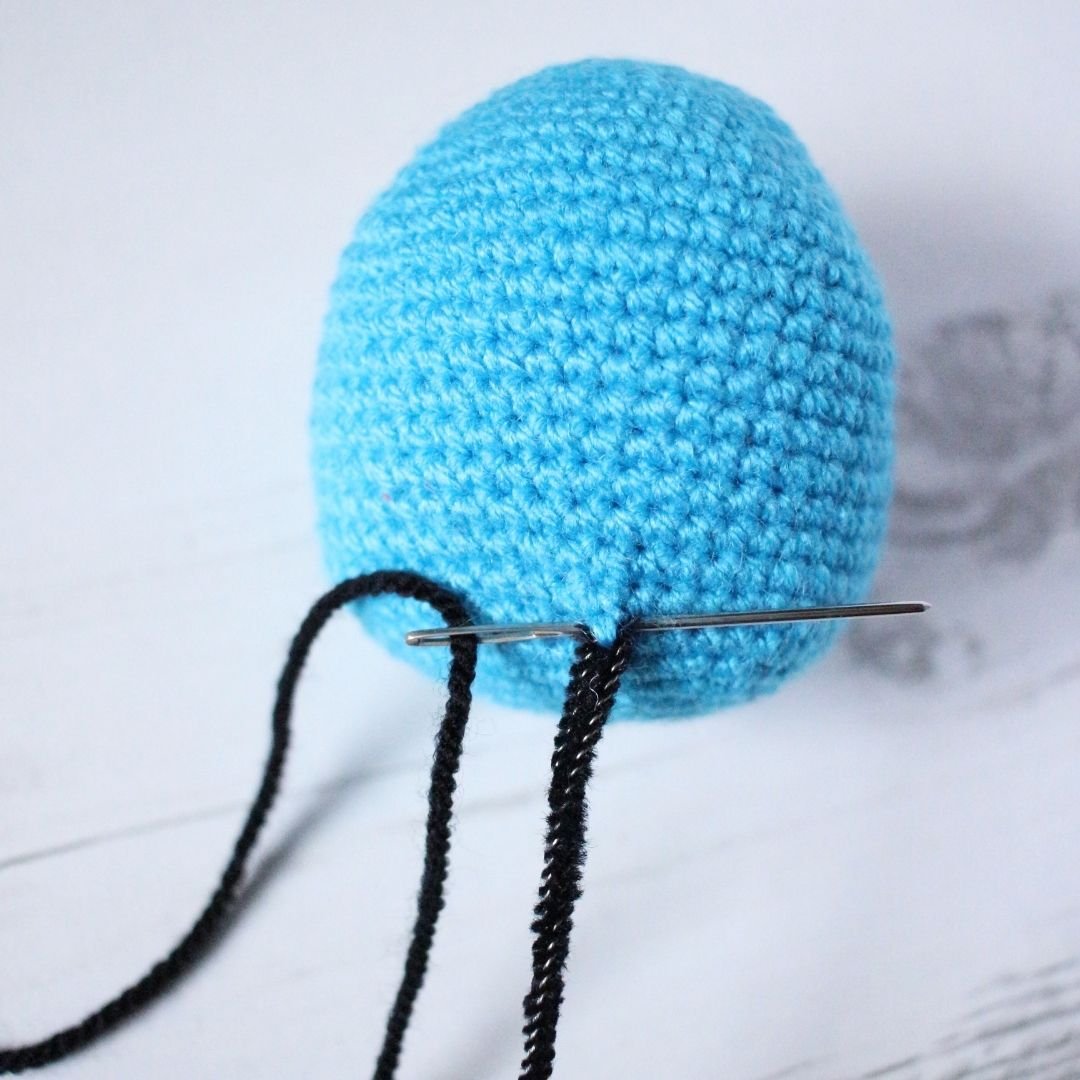
Insert pipe cleaner between two dc, pull half way through the other side of the dc and fold down.
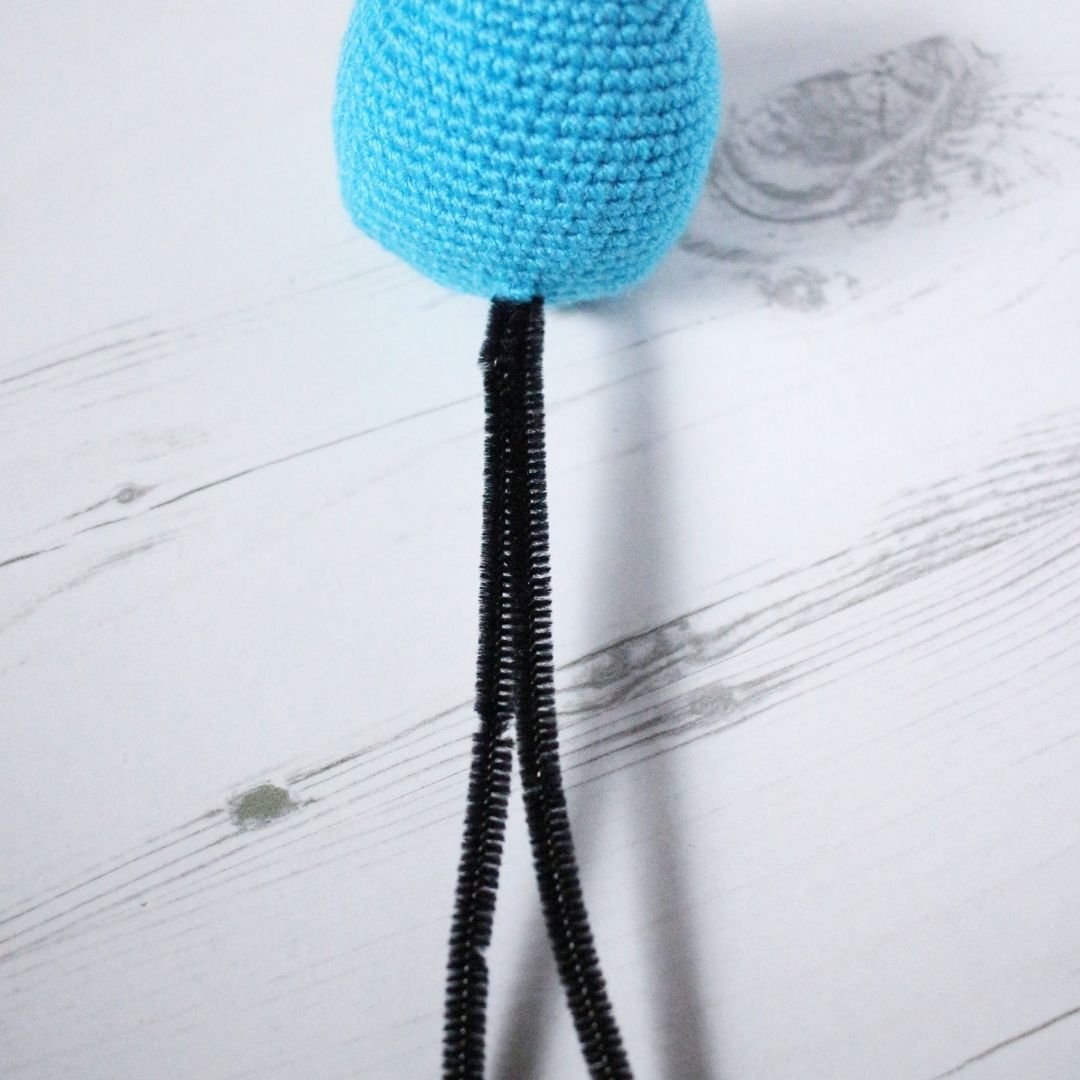
Twist the two sides around each other. I decided to trim the pipe cleaner.
Cut off a piece of black yarn - length should be approximately 5 times as long as the folded pipe cleaner. Insert yarn from left to right in the same place as the pipe cleaner, only pull through a short amount, about 5cm. Leave the longest end on the left hand side.
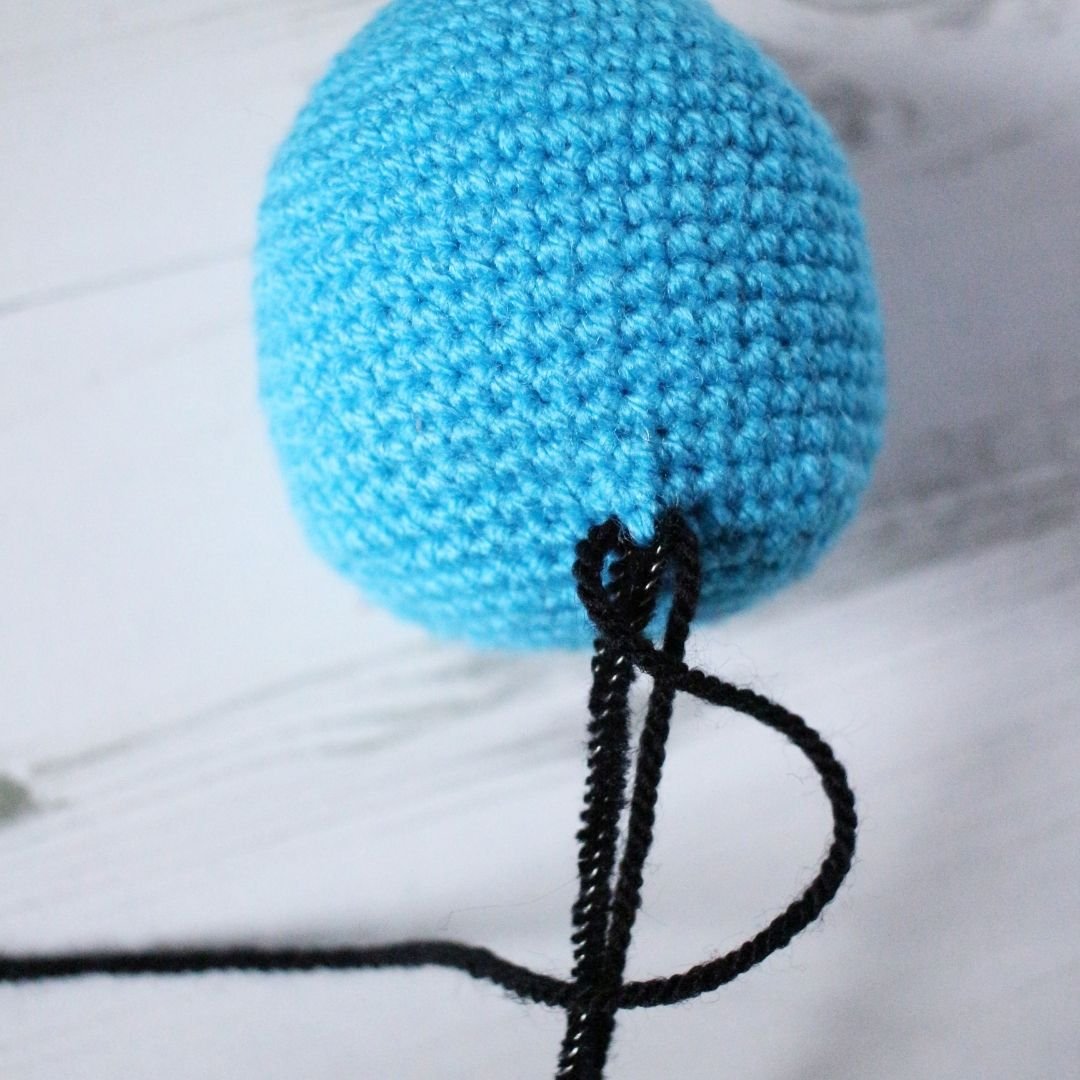
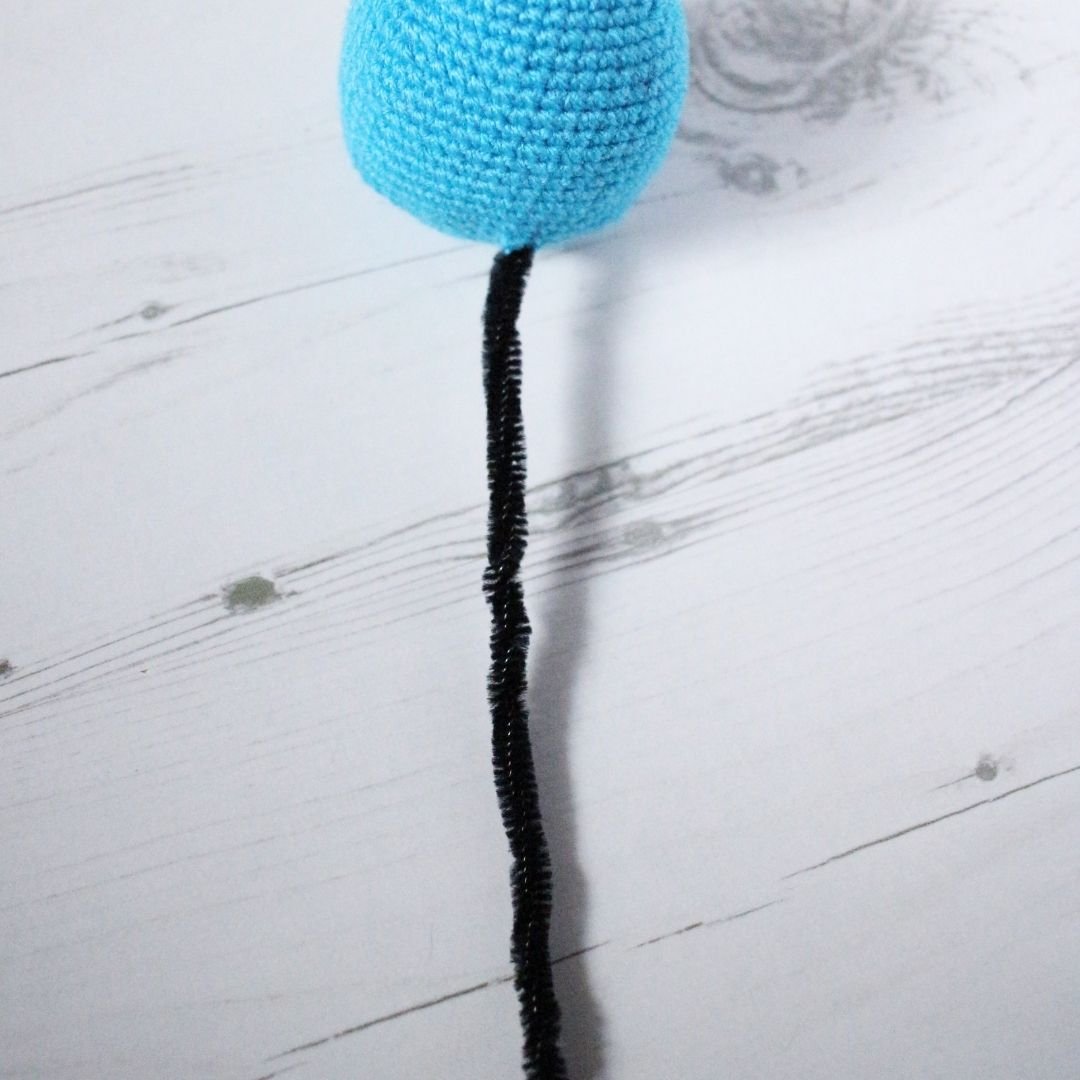
Hold the pipe cleaner and short end of the yarn together. Use the long end to tie a knot around the pipe cleaner / short end.
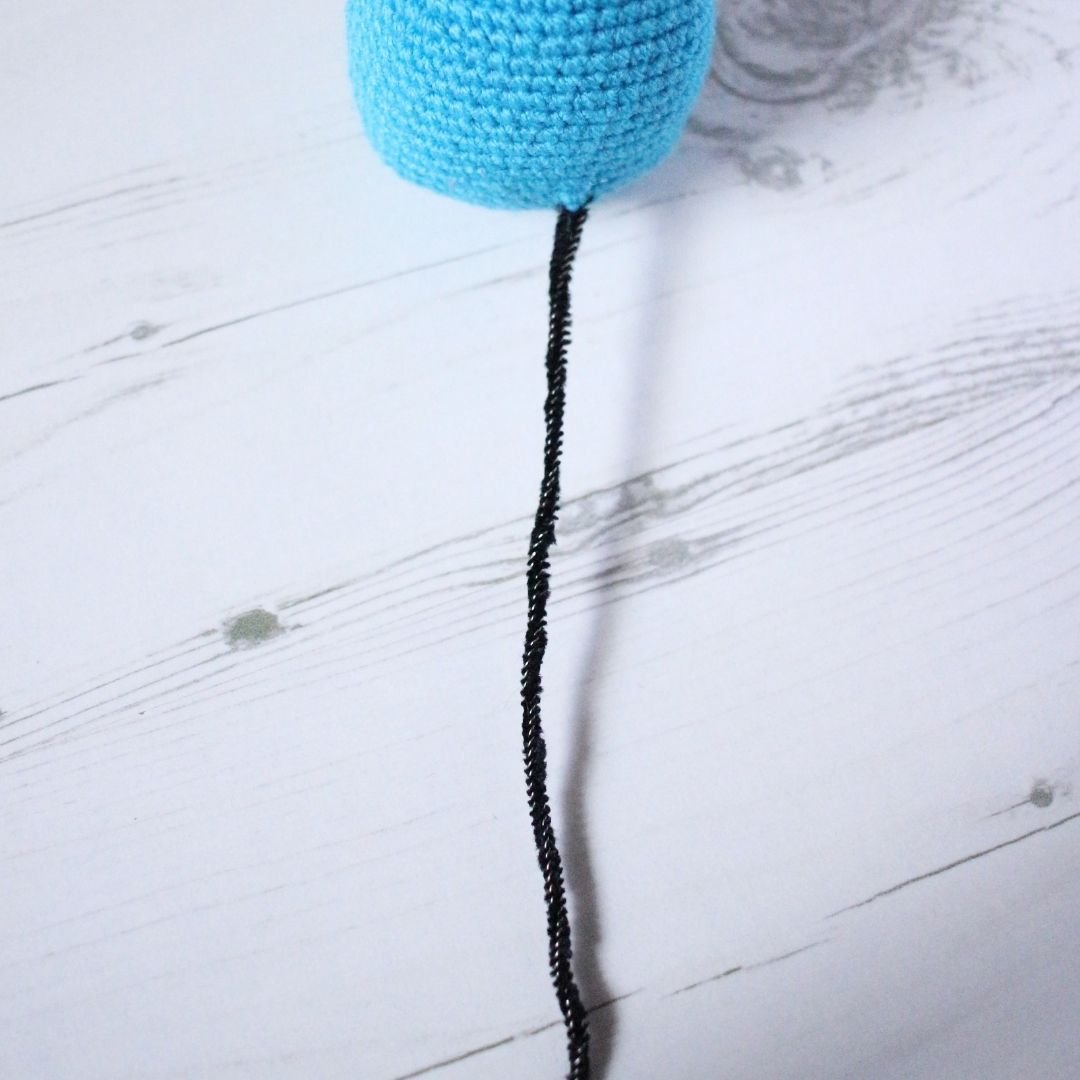
Keep tying knots around the pipe cleaner until you have 1cm to go until the end.

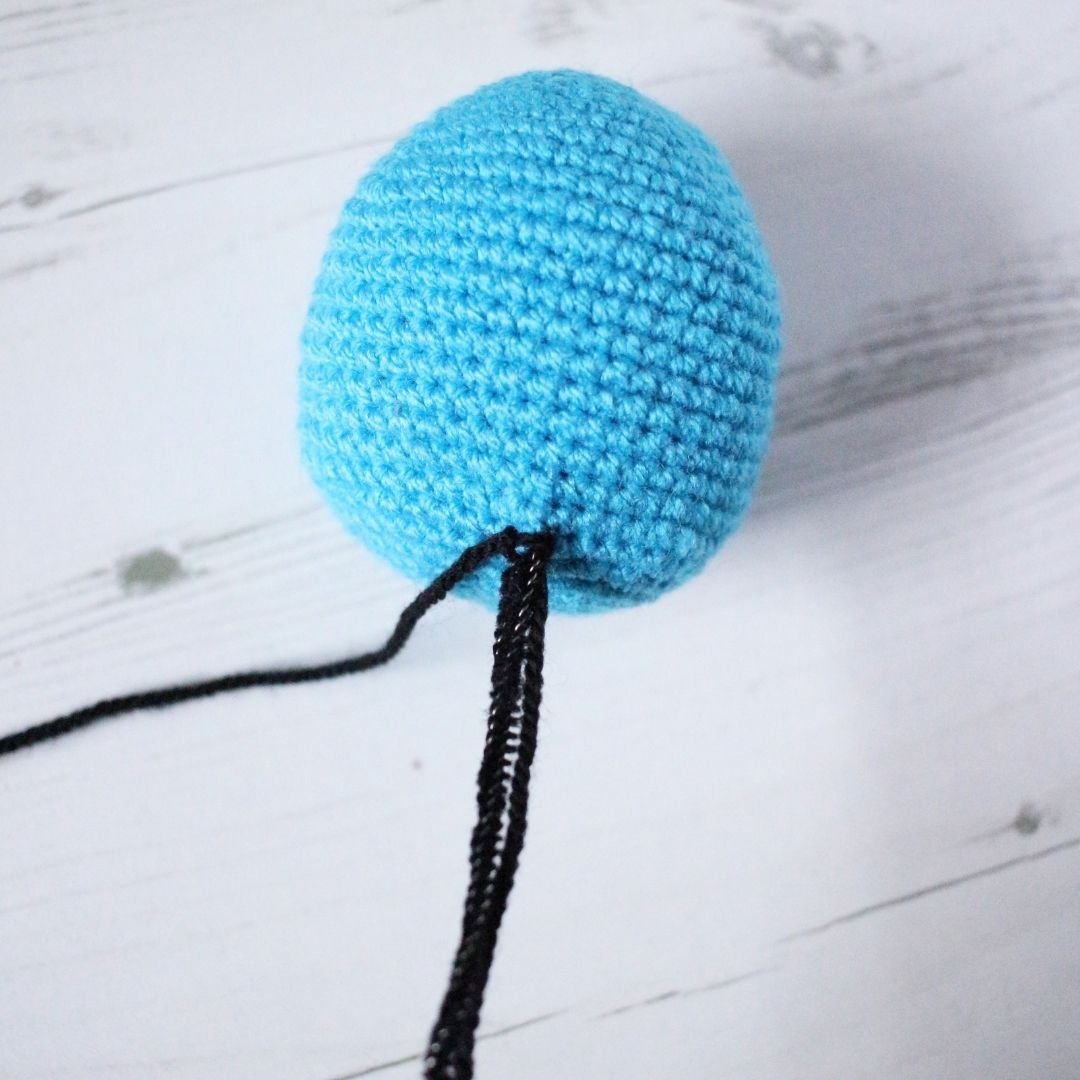
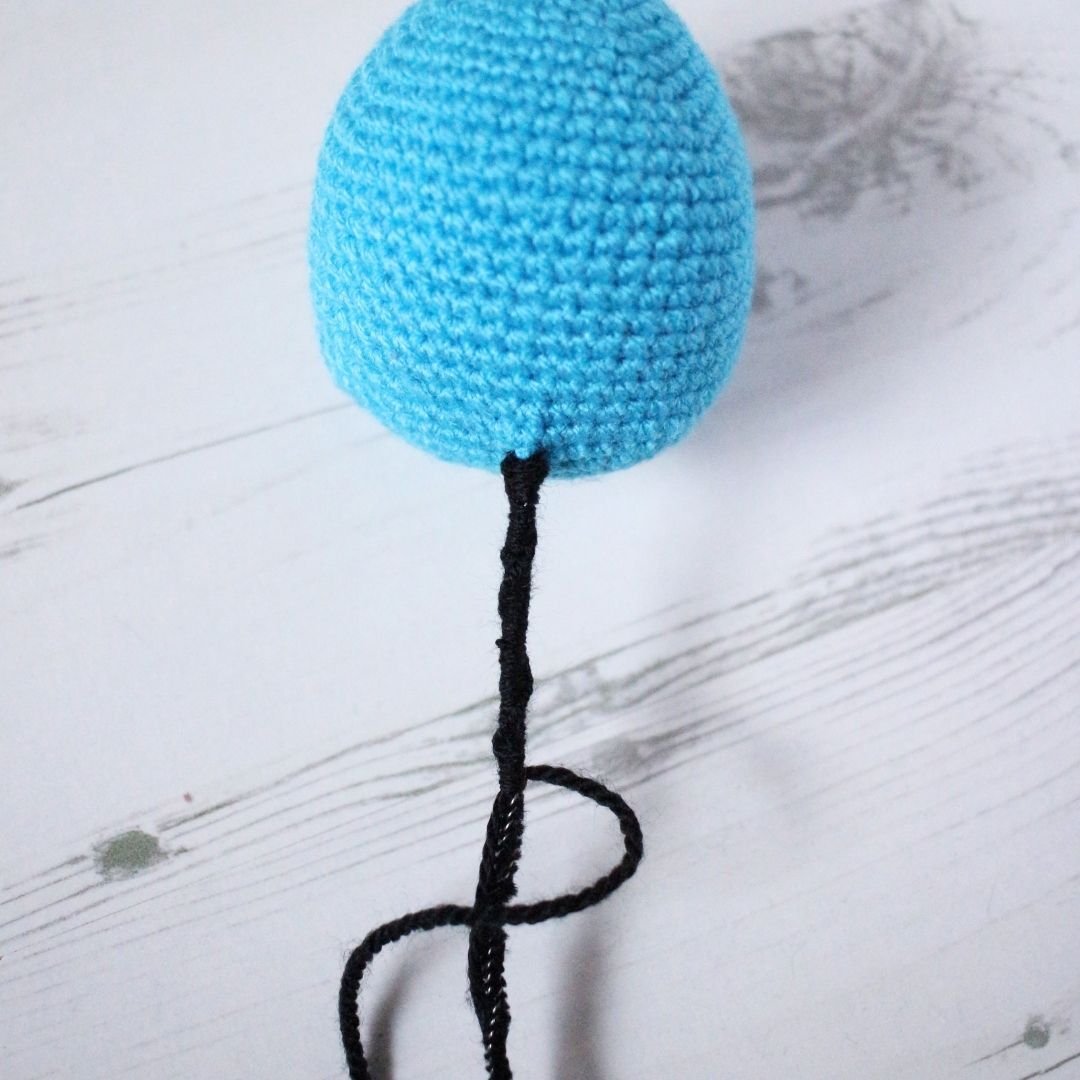
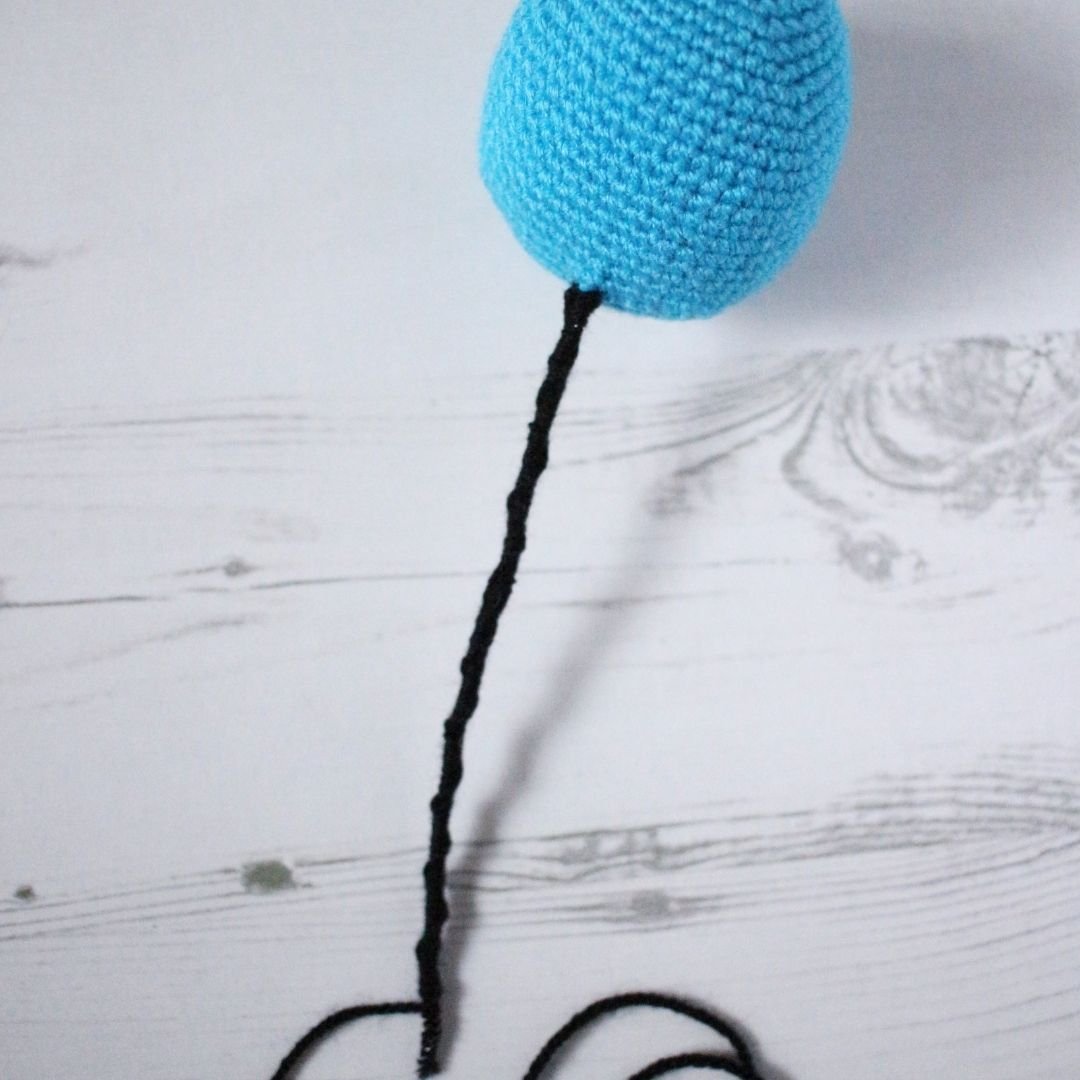
Insert the end of the pipe cleaner into the tail ball, and use the remaining length of the yarn to sew the pieces together. Then fold the tail and make a zig-zag shape - and voila!
Marill is finished!
THANK YOU & ENJOY!
Please do not reprint, sell or claim the pattern as your own.
I’ve loved creating this pattern so please don’t forget to credit the pattern designer.
I would love to see your creations! Please remember to tag me in your social media posts and use the following hashtag #loopycathrineamigurumi
For any questions about the pattern, please comment below and I will do my best to help.