
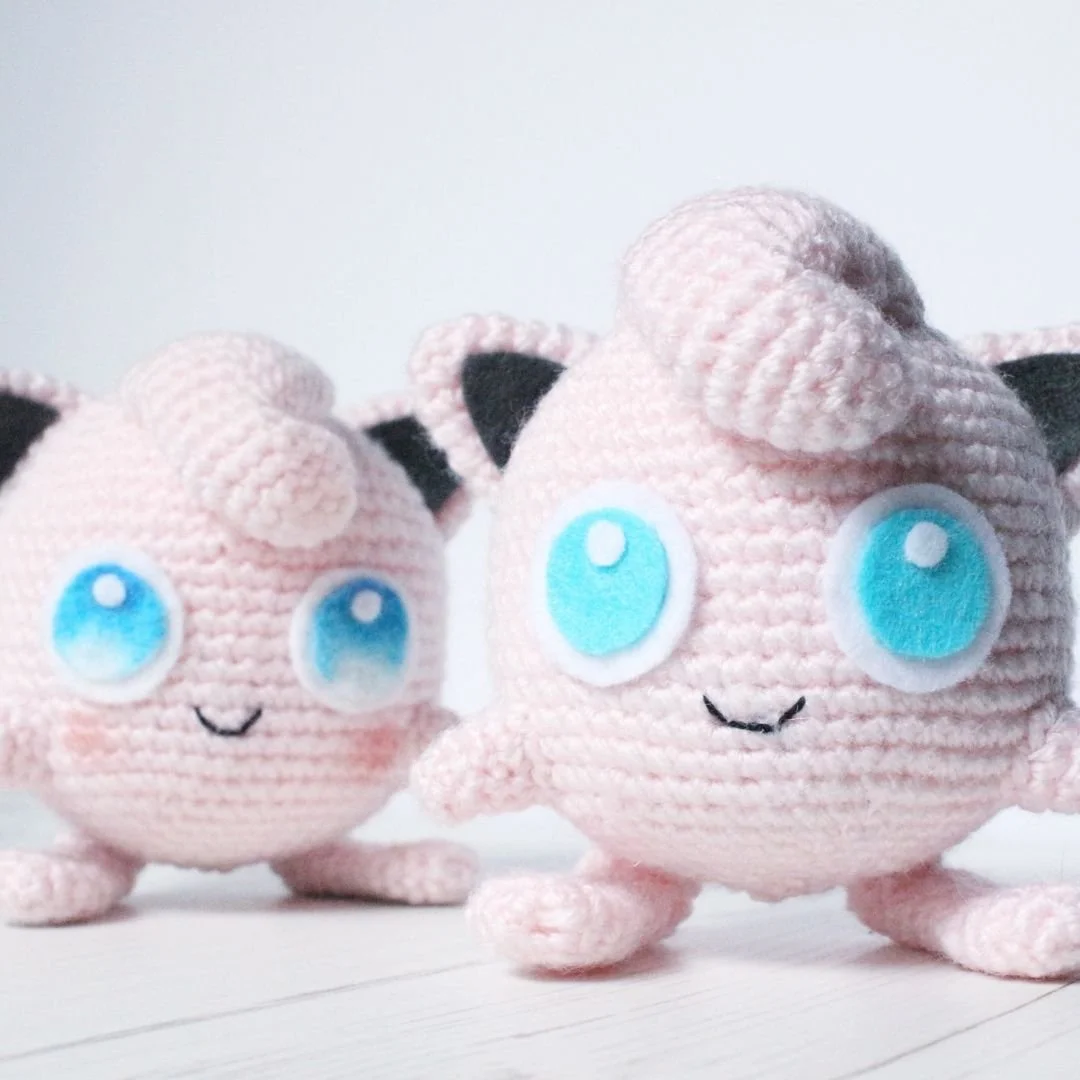
Jigglypuff Amigurumi Pattern
YARN & HOOK
I’ve used Stylecraft Special DK in Soft Peach with a 2mm hook – but any DK yarn & hook will do.
Felt: Turquoise and White felt for eyes, Grey for ears
Fabric glue to attach felt pieces
Wire or pipe cleaners for feet **
Black embroidery floss for mouth.
Polyester toy filling
Pins to place pieces before sewing together
Darning needle
Stitch markers (I prefer using scrap yarn as “stitch markers”)
** This is my first time using wire as I've normally used pipe cleaners before. I bought a 1mm wire for Jugglypuff's feet. It did the job, but I do think you can definitely go up in thickness as 1mm bends easily.
STITCHES & ABBREVIATIONS – UK ENGLISH
dc double crochet
sl st slip stitch
st/sts stitch/es
inc dc 2 in one st
dec decrease; insert hook in the front loop of the next two sts, yarn over, pull through both loops, y.o. and pull through remaining two loops –> one dc placed into two sts
ASSEMBLY
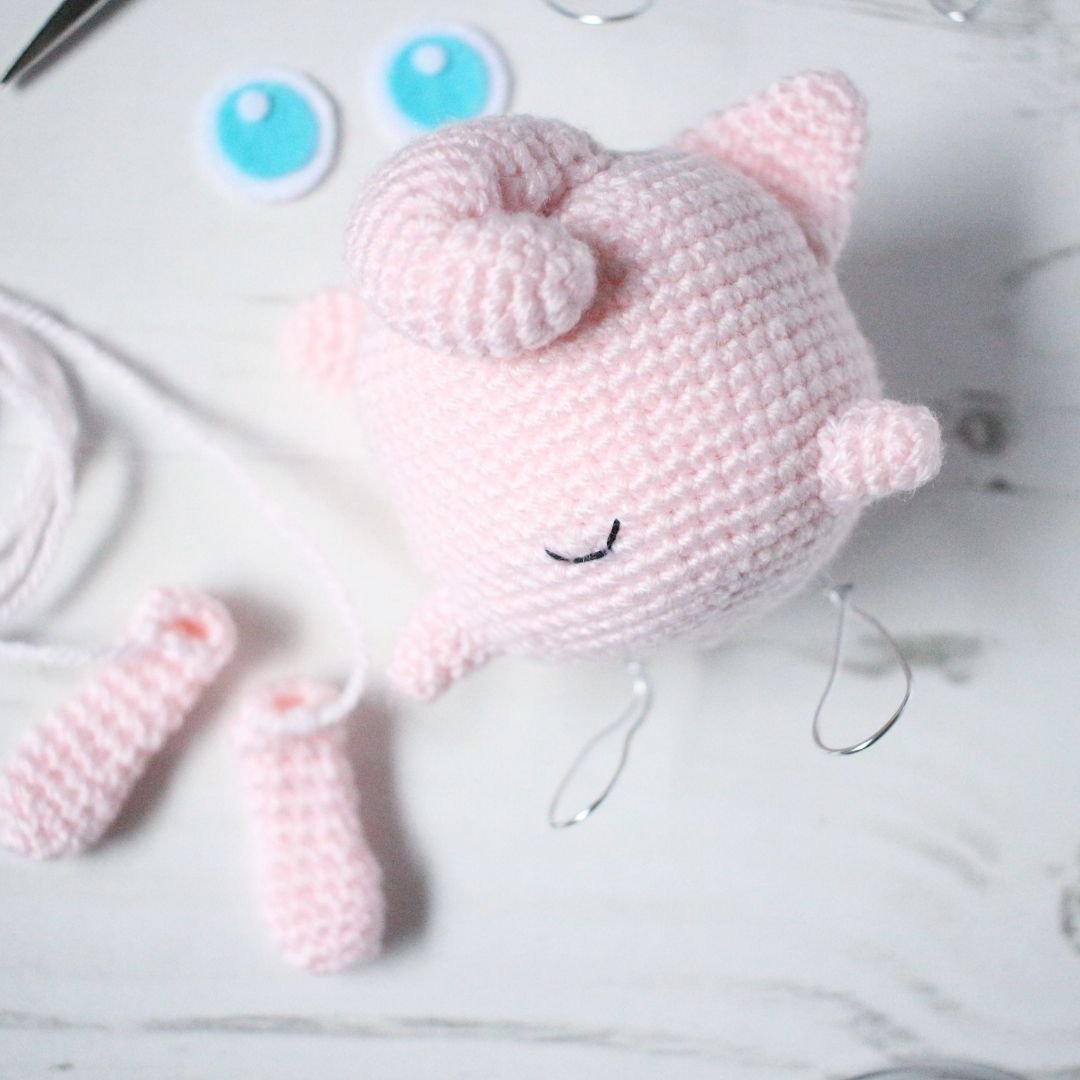
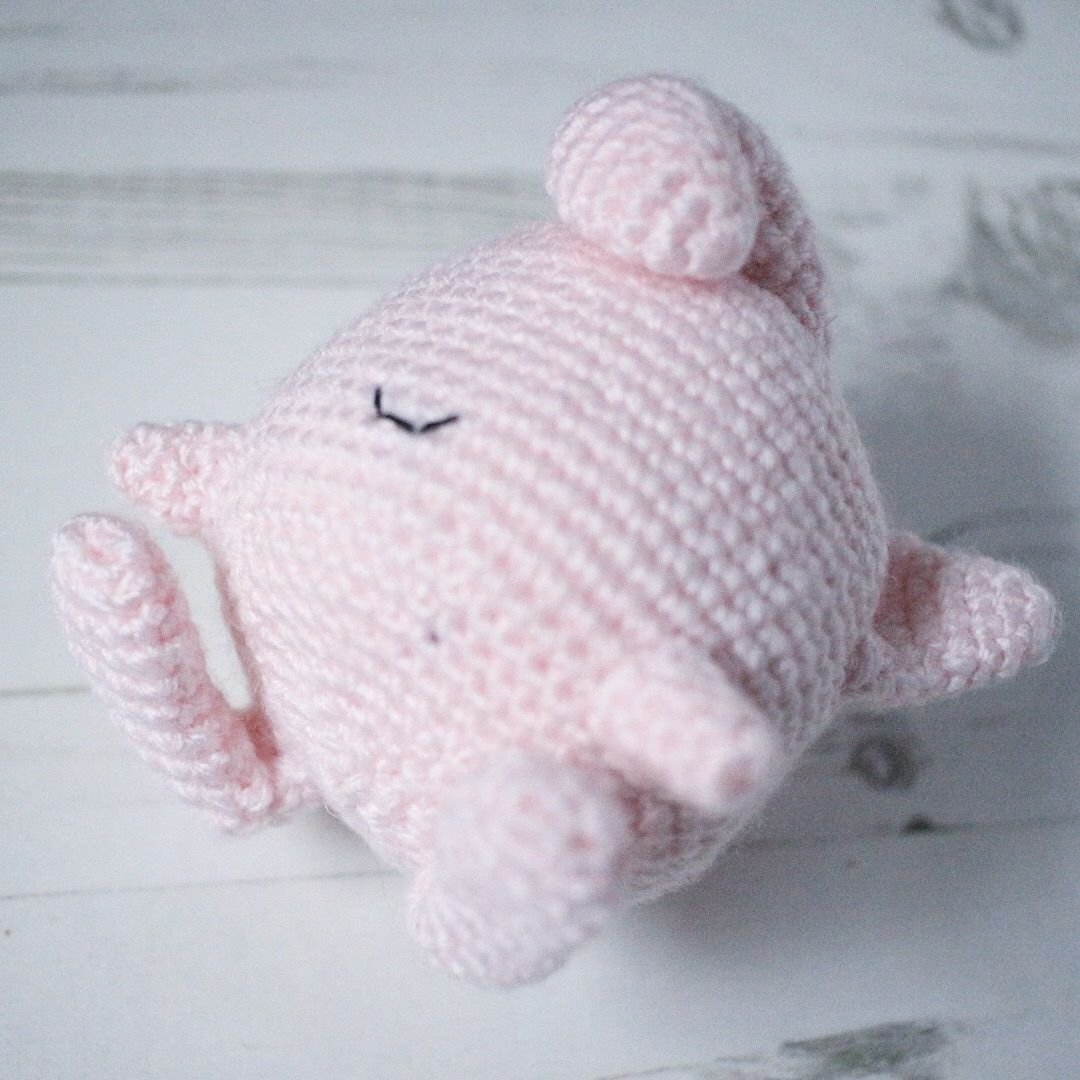
I would recommend assembling your Jigglypuff in the below order and use a photo of Jigglypuff as a reference for best possible outcome:
Attach quiff/curl to body
Position the eyes in without gluing them on - use this to work out best place to sew on smile.
Position and attach ears.
Position and attach hands
Position and attach feet - if you are using a wire or pipe cleaners please see optional instructions in the FEET section.
Once all pieces are sewn on glue on felt eyes and ear felt
THE PATTERN
THE BODY
Yarn: Soft Peach
Round 1: dc 6 in Magic Ring (6)
R2: Inc in all sts around (12)
R3: (dc, inc) x 6 (18)
R4: (dc 2, inc) x 6 (24)
R5: (dc 3, inc) x 6 (30)
R6: (dc 4, inc) x 6 (36)
R7: (dc 5, inc) x 6 (42)
R8: (dc 6, inc) x 8 (48)
R9: (dc 7, inc) x 6 (54)
R10-24: dc 54
R25: (dc 7, dec) x 6 (48)
R26: (dc 6, dec) x 6 (42)
R27: (dc 5, dec) x 6 (36)
R28: (dc 4, dec) x 6 (30)
Start stuffing the body. Before we move on I just wanted to check in… Are you reading this somewhere other than www.loopycathrine.com? Did you pay for it? Then you have been dooped. This is a free pattern on the above mentioned website only. Please head over there and let me know where you found it, report the seller on the platform you purchased the pattern and claim your money back. Thank you!
R29: (dc 3, dec) x 6 (24)
R30: (dc 2, dec) x 6 (18)
R31: (dc, dec) x 6 (12)
R32: (dec) x 6 (6)
Fasten off and sew in loose end.
QUIFF / CURL
Yarn: Soft Peach
Round 1: dc 6 in Magic Ring (6)
R2: (dc, inc) x 3 (9)
R3: (dc 2, inc) x 3 (12)
R4-9: dc 12
R10: (dc 3, inc) x 3 (15)
R11: dc 15
R12: (dc 4, inc) x 3 (18)
R13: 18
The rest of the quiff/curl will be worked in rows - so do not fasten off quite yet
Row 14: dc 11, turn
Row 15: dc 11, turn
Row 16: dc 11, turn
Row 17: sk the st at base, dc 8, sk 1 st, and dc in the last st, turn (9dc)
Row 18: sk the st at base, dc 6, sk 1 st, and dc in the last st (7dc)
Fasten of and leave a long end for sewing.
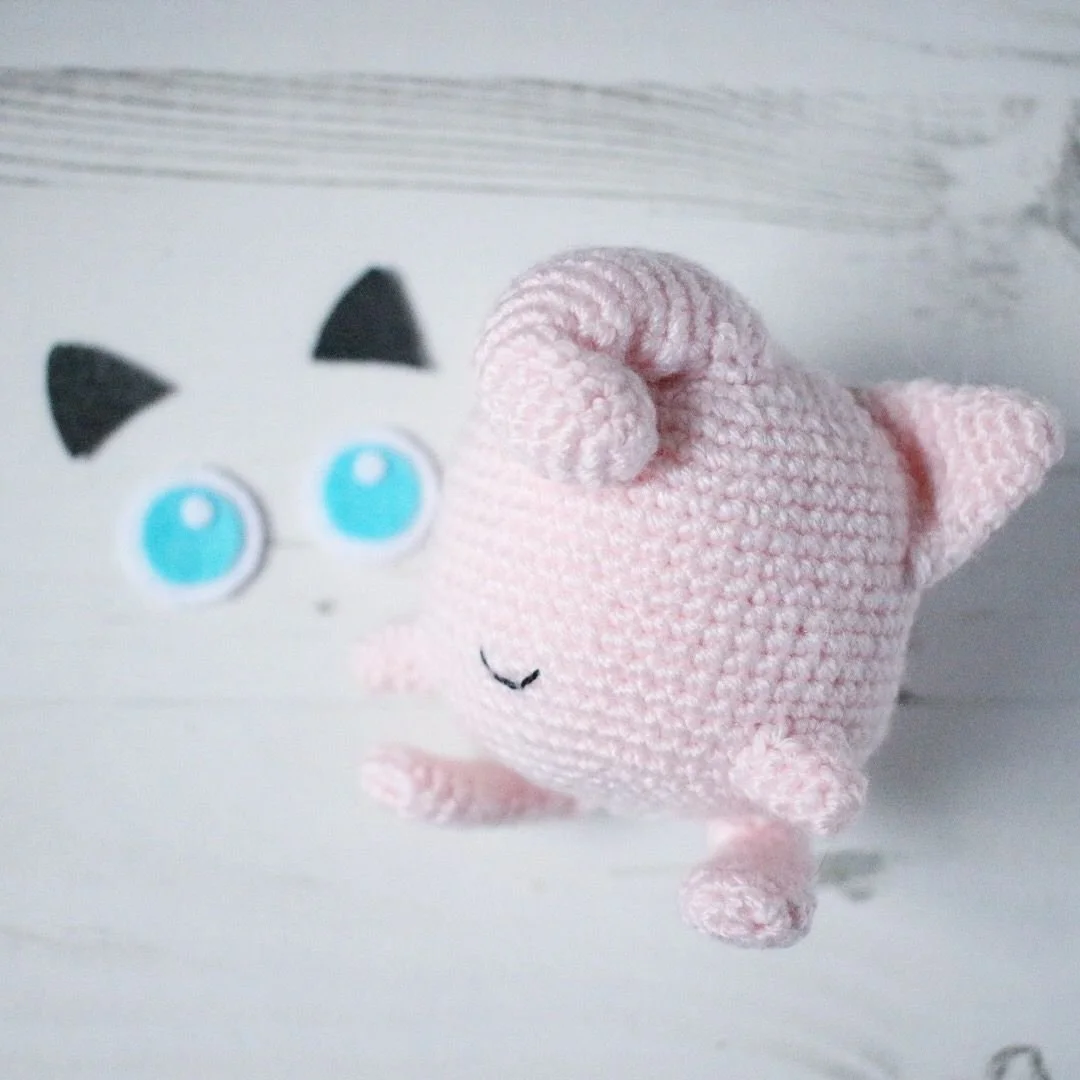
Sew the quiff/curl onto the top of the head - use a little bit of polyester. You don't want it to be too firm as you will need to fold the bottom half of it to the right - see photo below - and attach it onto the right side of the quiff. Once secured weave in end.
EYES & MOUTH
Use white and turquoise felt for the eyes. Cut out two big, round pieces in white felt, two slightly smaller pieces in turquoise, and two small round pieces in white - glue the pieces together. I would recommend using a photo of Jigglypuff to achieve the right size, look and placement.
Alternatively just use white felt. Cut our two big round pieces, and two slightly smaller round pieces. Use various shades of turquoise Pro-Markers to colour in a nice gradient on the smaller pieces - see photos below and glue this on top of the white piece. Add a tiny round piece at the top of the eye.Once you've positioned the eyse (don't glue them on just yet), use black embroidery floss to sew on a little smile. I would recommend attaching any felt once all other pieces have been sewn on.
EARS
Yarn: Soft Peach
Make 2
Round 1: dc 6 in Magic Ring (6)
R2: (dc, inc) x 3 (9)
R3: dc 9
R4: (dc 2, inc) x 3 (12)
R5: dc 12
R6: (dc 2, inc) x 4 (16)
R7: dc 16
Fasten off and leave long end for sewing
ARMS
Yarn: Soft Peach
Make 2
Round 1: dc 6 in Magic Ring (6)
R2: dc 6
R3: (dc, inc) x 3 (9)
R4: dc 9
R5: (dc 2, inc) x 3 (12)
Fasten off and leave long end for sewing
Cut out two pieces of grey triangle felt to be glued onto ears. Again - I would recommend doing this last, once all other pieces have been sewn on.
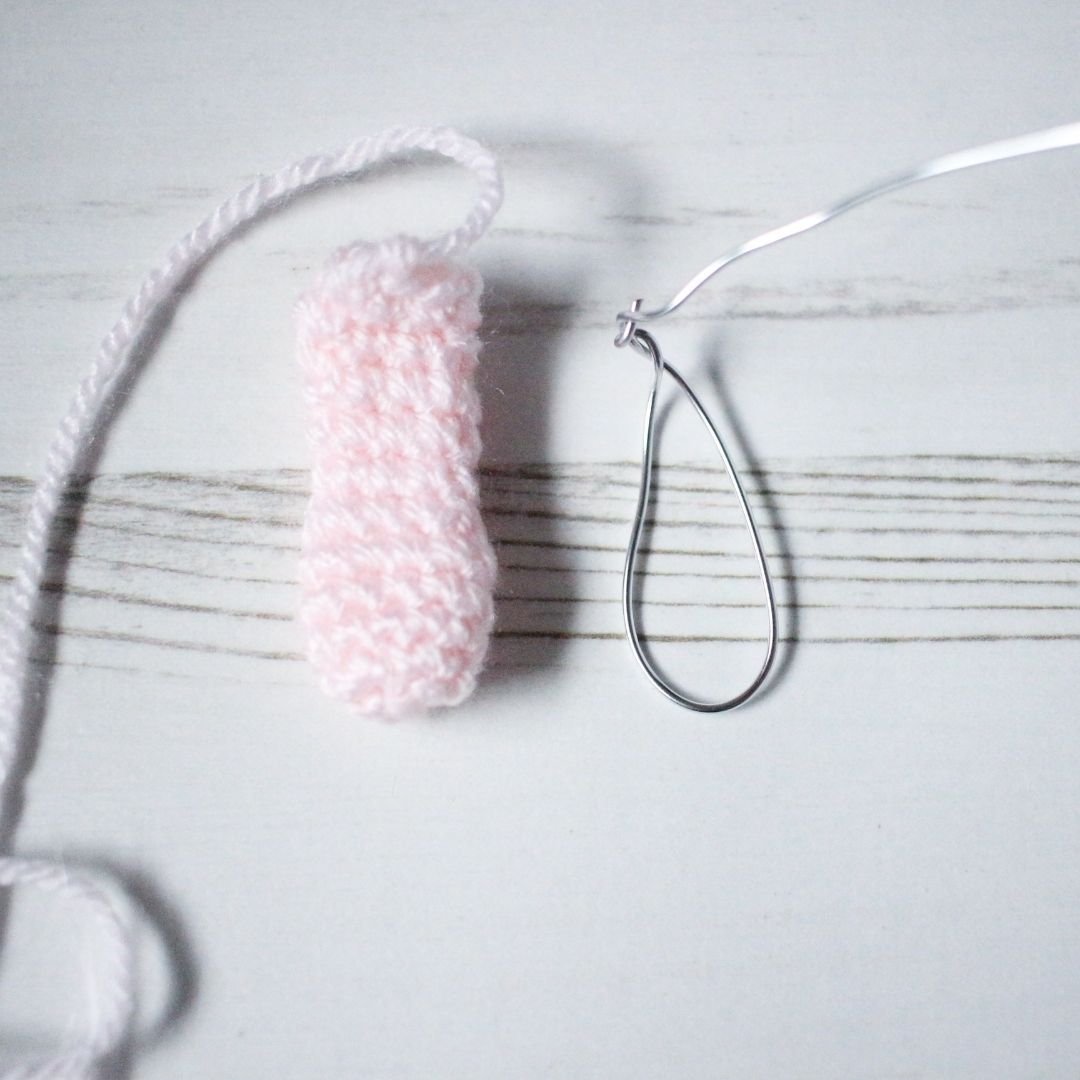
FEET
I've used the same instructions for Jigglypuff's feet as I did for Marill
Yarn: Soft Peach
Make 2
ch 3 – we will be working around the top and bottom of these chains
Round 1: dc in second ch from hook, inc in next stitch, dc in the other side of ch, inc in second ch (6)
R2: (inc, inc, dc) x 2 (10)
R3-5: dc 10
R6: (dec, dc 3) x 2 (8)
R7-9: dc 8
We will now continue to make the heel - so do not fasten of just yet:
R10: dc 1, turn
R11 (Row): ch1, dc 4 (turn)
R12: ch1, dc 4, – we are now working in rounds again so keep going without turning: – dec in side of row and next dc from previous round, dc 2, dec in next dc and side of next row
R13: dc 8
Fasten off and leave long end for sewing.
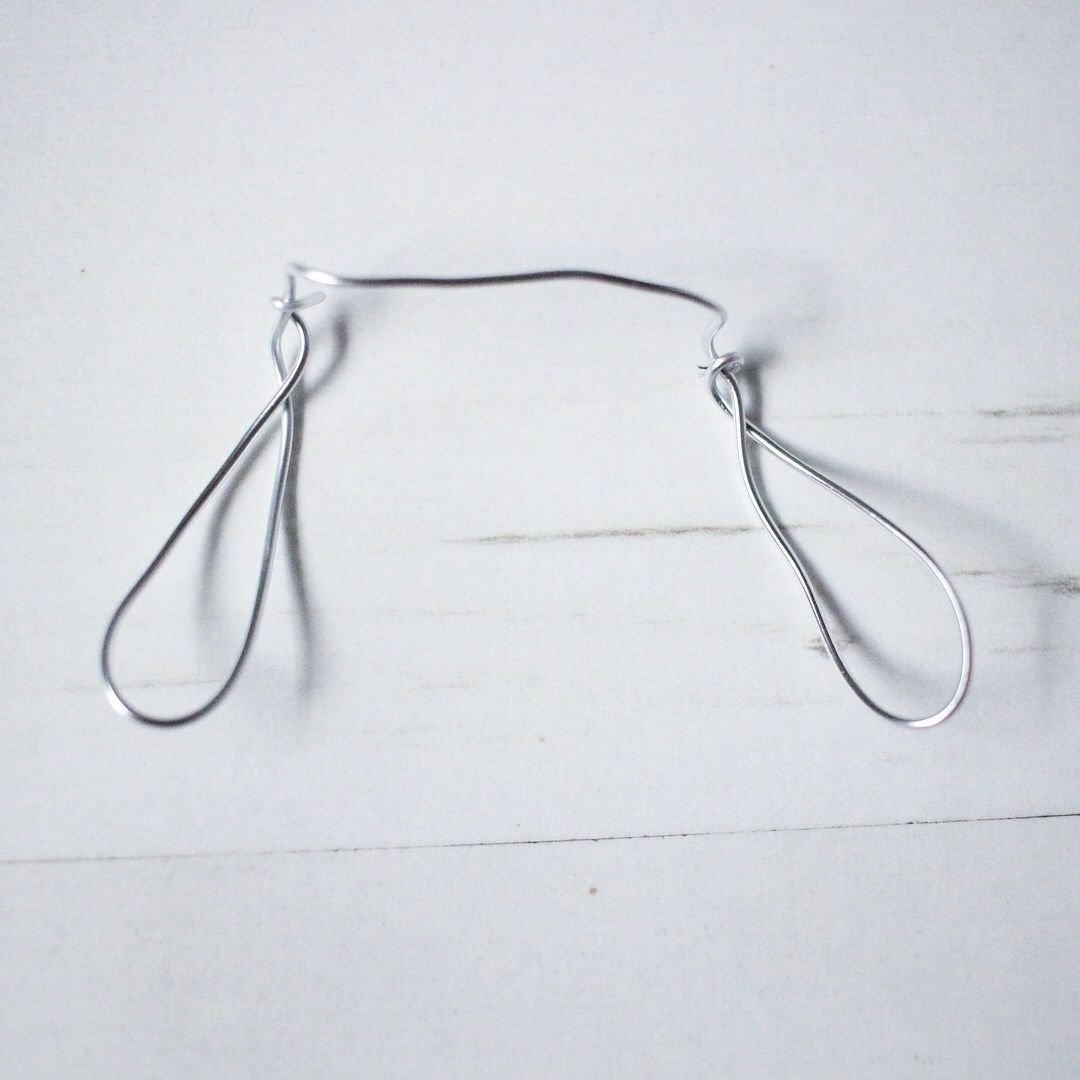
Optional: Use a piece of wire or a pipecleaner to create a little skeleton for the feet - this will make Jigglypuff a bit sturdier on its feet. First, shape one of the ends into the a foot that will fit into the crocheted piece. Work out where you'd like to position the feet. Insert the side of the wire that is still straight into the body where the first foot should be, and out where the second foot should be. Fold the second foot. See Below images.
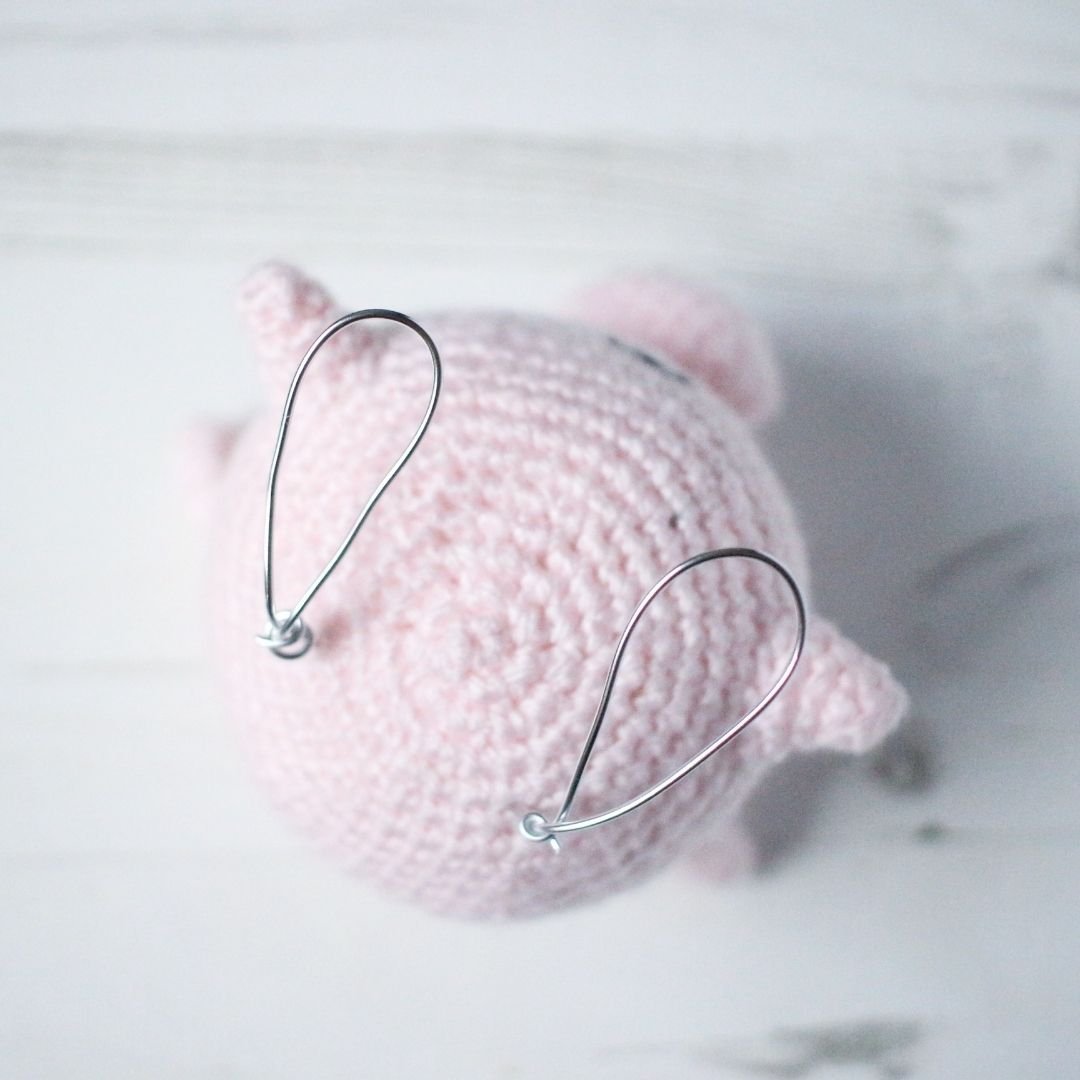
The below "wire skeleton" is what the feet should look like - although remember to fold the second foot once you've inserted into the body.
THANK YOU & ENJOY!
Please do not reprint, sell or claim the pattern as your own.
I’ve loved creating this pattern so please don’t forget to credit the pattern designer.
I would love to see your creations! Please remember to tag me in your social media posts and use the following hashtag #loopycathrineamigurumi
For any questions about the pattern, please comment below and I will do my best to help.