
Poliwag Amigurumi Pattern

YARN & HOOK
2mm hook
Stylecraft Special DK in Aster, White, Soft Peach and Midnight
Black and White felt
White thread
Black pipe cleaner or wire for feet and tail
Polyester toy filling
Pins to place pieces before sewing together
Darning needle and small needle
Stitch markers (I prefer using scrap yarn as “stitch markers”)
SIZE
Poliwag is approximately 9cm tall, and 7cm in width, and approximately 16cm from front to the tip of the tail – but this will vary depending on the length of your tail.Weight: 55 grams (this includes all materials used in making Poliwag)
STITCHES & ABBREVIATIONS – UK ENGLISH
ch chain
dc double crochet
sl st slip stitch
st/sts stitch/es
inc dc 2 in one st
dec decrease; insert hook in the front loop of the next two sts, yarn over, pull through both loops, y.o. and pull through remaining two loops –> one dc placed into two sts
ASSEMBLY
I would recommend using a photo of Wooper for reference for best possible outcome. Assesmble in the same order the pattern is written.
THE PATTERN
HEAD & BODY
The head and body will be worked as on piece from top to bottom.
Yarn: Aster
Round 1: dc 6 in Magic Ring (6)
R2: inc in all sts around (12)
R3: (dc, inc) x 6 (18)
R4: (dc 2, inc) x 6 (24)
R5: dc 24
R6: (dc 3, inc) x 6 (30)
R7: (dc 4, inc) x 6 (36)
R8: (dc 5, inc) x 6 (42)
R9: (dc 6, inc) x 6 (48)
R10: dc 48
R11: (dc 7, inc) x 6 (54)
R12: (dc 8, inc) x 6 (60)
R13: (dc 9, inc) x 6 (66)
R14-25: dc 66
R26: (dc 9, dec) x 6 (60)
R27: (dc 8, dec) x 6 (54)
R28: (dc 7, dec) x 6 (48)
R29: (dc 6, dec) x 6 (42)
R30: (dc 5, dec) x 6 (36)
R31: (dc 4, dec) x 6 (30)
Stuff the body. Before we move on I just wanted to check in… Are you reading this somewhere other than www.loopycathrine.com? Did you pay for it? Then you have been dooped. This is a free pattern on the above mentioned website only. Please head over there and let me know where you found it, report the seller on the platform you purchased the pattern and claim your money back. Thank you!
R32: (dc 3, dec) x 6 (24)
R33: (dc 2, dec) x 6 (18)
R34: (dc, dec) x 6 (12)
R35: dec x 6 (6)
Fasten off and weave in loose end.
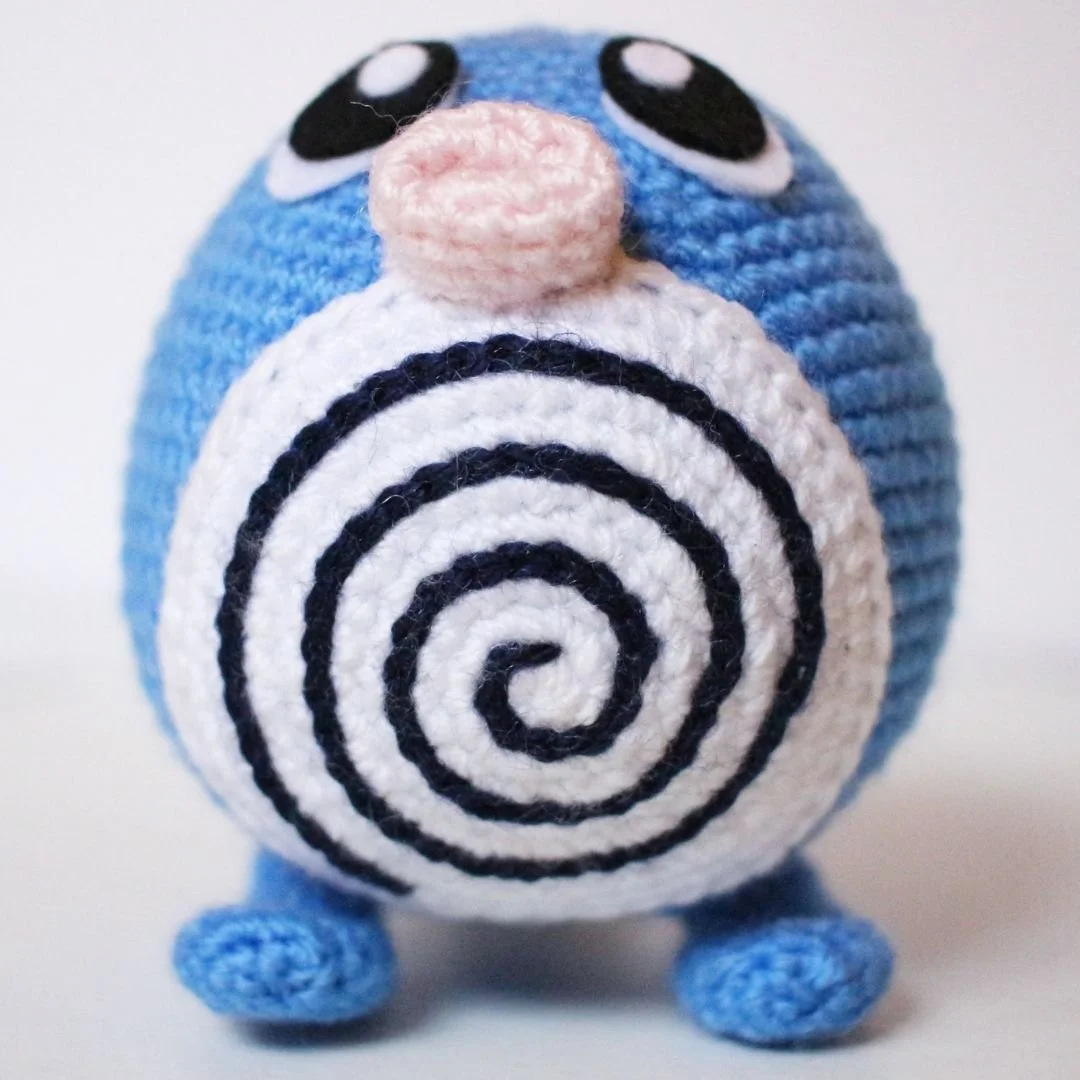
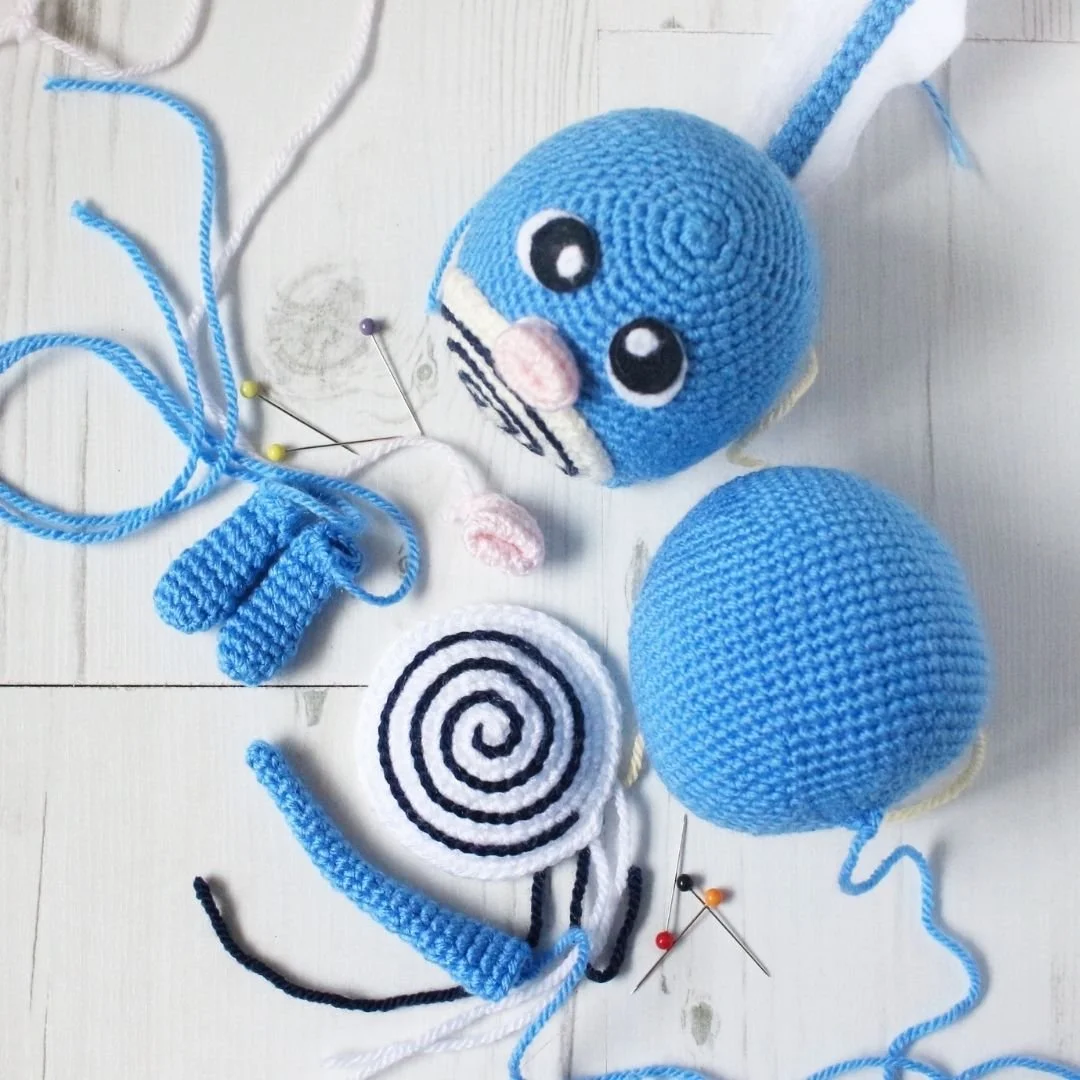
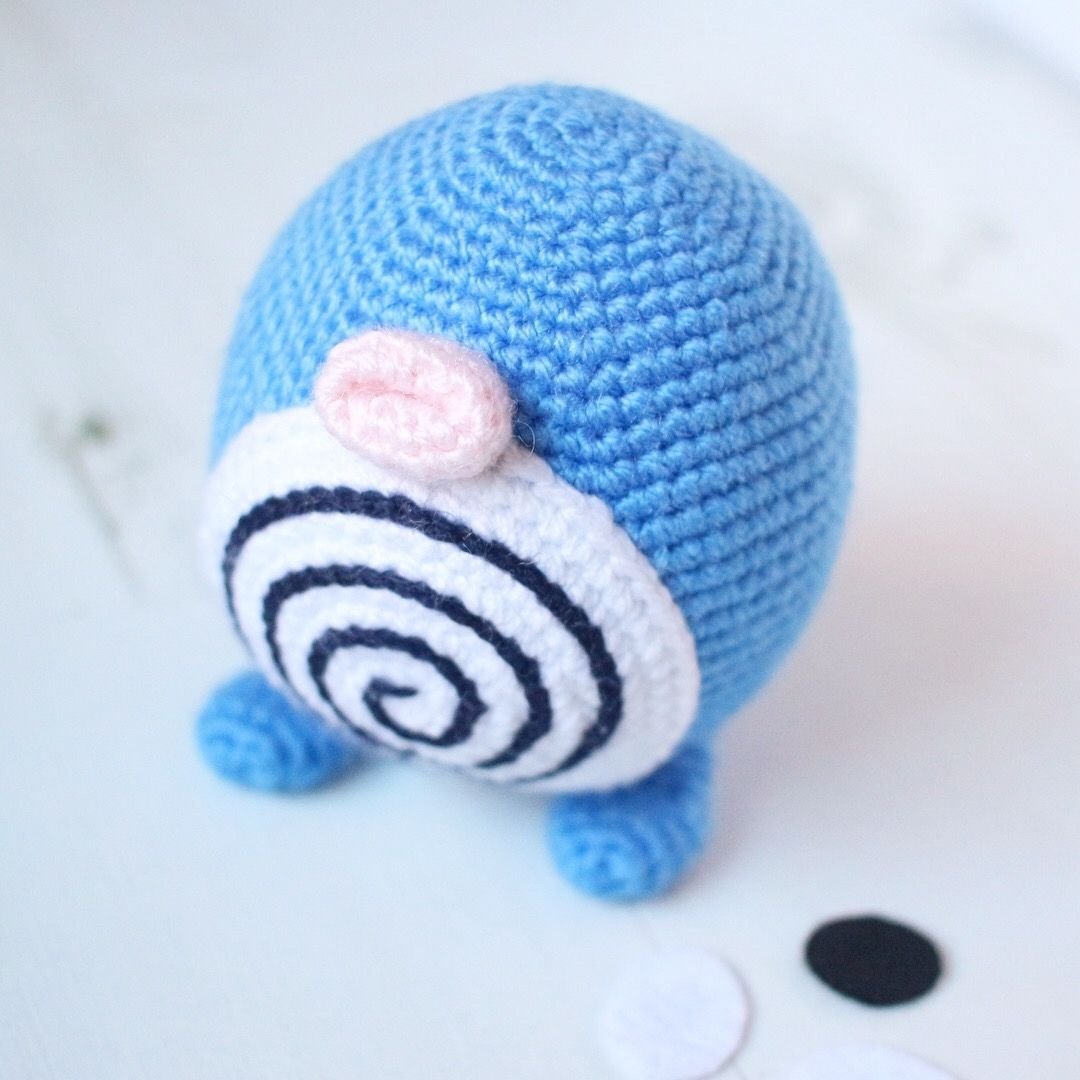
BELLY PIECE
Yarn: White
Round 1: dc 6 in Magic Ring (6)
R2: inc in all sts around (12)
R3: (dc, inc) x 6 (18)
R4: (dc, inc, dc) x 6 (24)
R5: (inc, dc 3) x 6 (30)
R6: (dc 3, inc, dc) x 6 (36)
R7: (dc, inc, dc 4) x 6 (42)
R8: (dc 6, inc) x 6 (48)
R9: dc 48
Fasten off and leave long end, long enough to sew around the piece and onto the body. But first we’re going to create the spiral using surface slip stitches (If this is new to you there are several good tutorials on YouTube). For this pick up your Midnight yarn starting in the middle and working your way out. I’ve placed the slip stitches on every other round of the white belly piece. Once the spiral is finished place the top edge of the piece between rounds 12 and 13 of the body. Pin into place and sew.
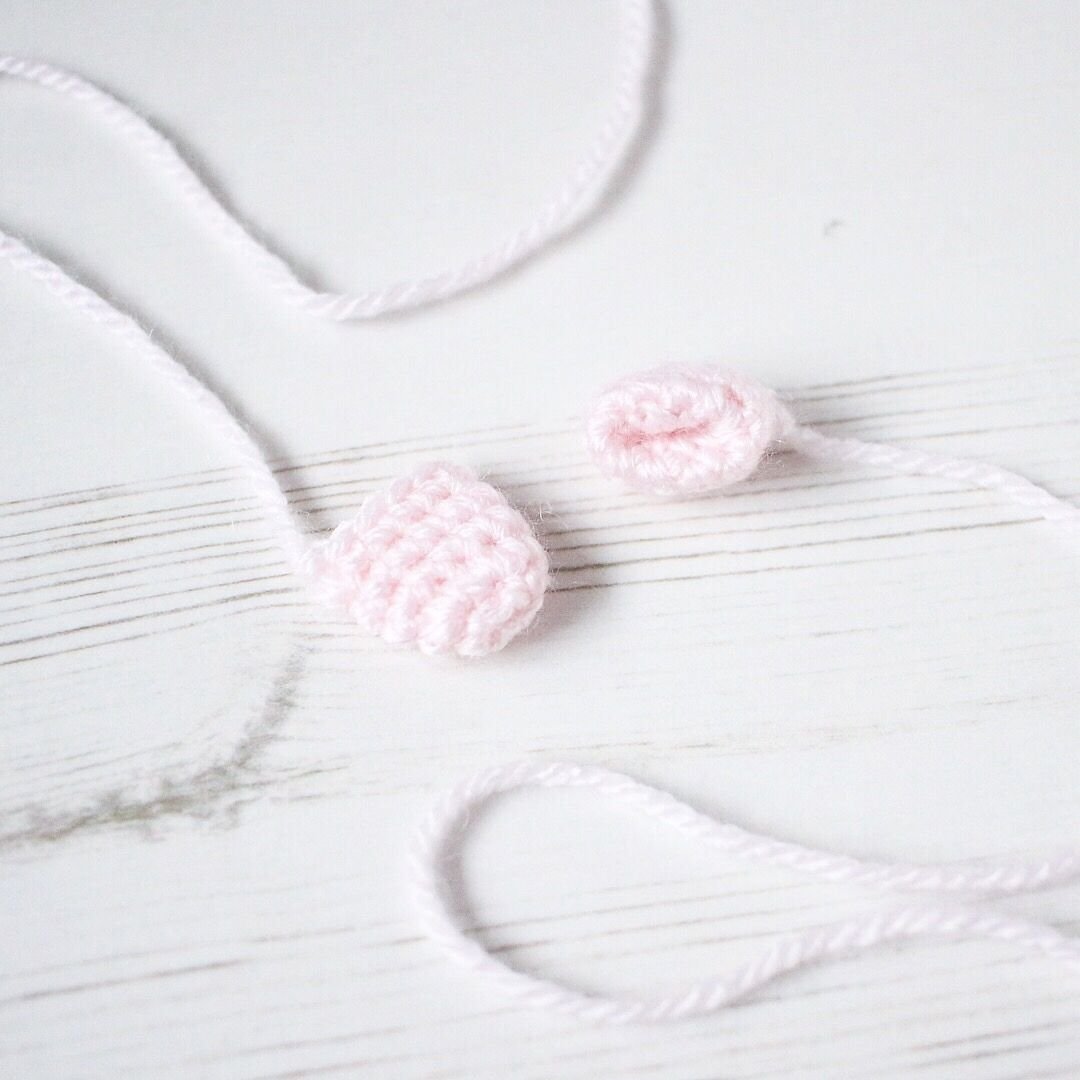
MOUTH
Yarn: Soft Peach
ch 3
Round 1: dc in second ch from hook, inc in next st, dc on the other side of the same ch, inc in last ch (6)
R2: (inc, inc, dc) x 2 (10)
R3-5: dc 10Fasten off and leave long end for sewing.Use the back of your crochet hook to push in the tip into the middle of the piece. Fold down to create the oval shape of the mouth. Place the top edge of the mouth between rounds 10 and 11 of the body, and the bottom part slightly on the top edge of the belly piece. Pin into place and sew.
FEET
Yarn: Aster
Make 2
ch 3 – we will be working around the top and bottom of these chains
Round 1: dc in second ch from hook, inc in next stitch, dc in the other side of ch, inc in second ch (6)
R2: (inc, inc, dc) x 2 (10)
R3-5: dc 10
R6: (dec, dc 3) x 2 (8)
R7-9: dc 8
We will now continue to make the heel – so do not fasten of just yet:
R10: dc 1, turn
R11: (Row): ch1, dc 4 (turn)
R12: ch1, dc 4, – we are now working in rounds again so keep going without turning: – dec in side of row and next dc from previous round, dc 2, dec in next dc and side of next row
R13: dc 8
Fasten off and leave long end for sewing. I used wire to make the feet a bit sturdier.
Check out my Jigglypuff pattern here to see instructions on how I made the ‘wire skeleton’ for the feet.
TAIL
Yarn: Aster
Round 1: dc 5 in Magic Ring (5)
R2-4: dc 5
R5: inc, dc 4 (6)
R6-8: dc 6
R9: inc, dc 5 (7)
R10-12: dc 7
R13: inc, dc 6 (8)
R14-16: dc 8
R17: inc, dc 7 (9)
R18-20: dc 9
R21: inc, dc 8 (10)
R22-24: dc 10
Fasten off and leave long end for sewing.
Optional: use wire or a pipe cleaner as a skeleton to make the tail a bit sturdier and to bend into a nice shape. I’ve inserted my wire around a stitch in round 28 of the body, pulled it half way through and folded in half.
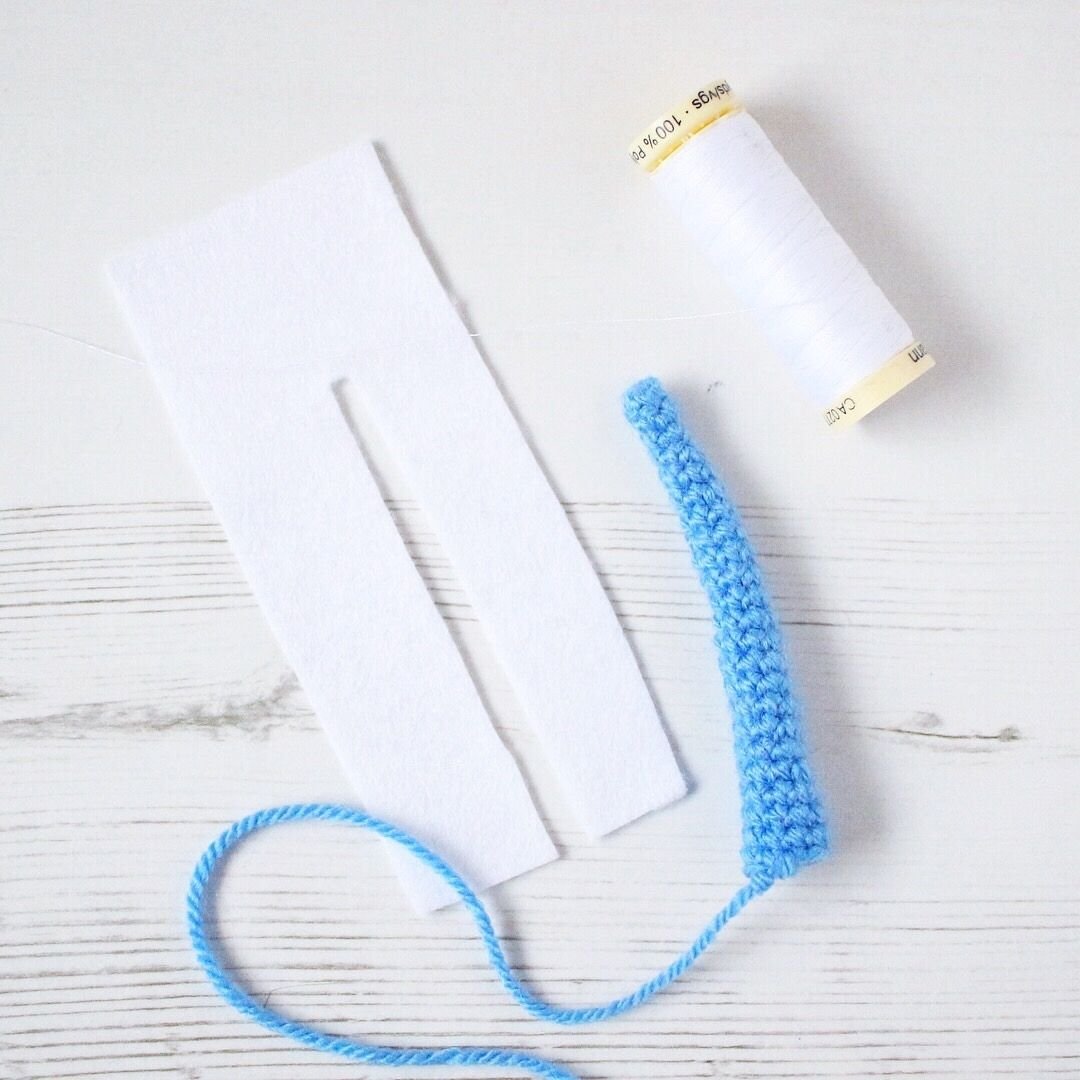
Cut out a rectangular piece of white felt (see photo below) with roughly 2cm on either side of the tail when placed in the middle, and approximately 2 cm above the tip of the tail. Cut out a small 0.5 cm strip in the middle of the rectangle as per below photo. This will be wrapped around the tail. Start to slightly shape the felt making sure you leave the final adjustments till last. Attach the blue tail to the body, then start sewing (or gluing, if you prefer) the white piece of felt onto the tail. Make the final adjustments to the shape of the felt.
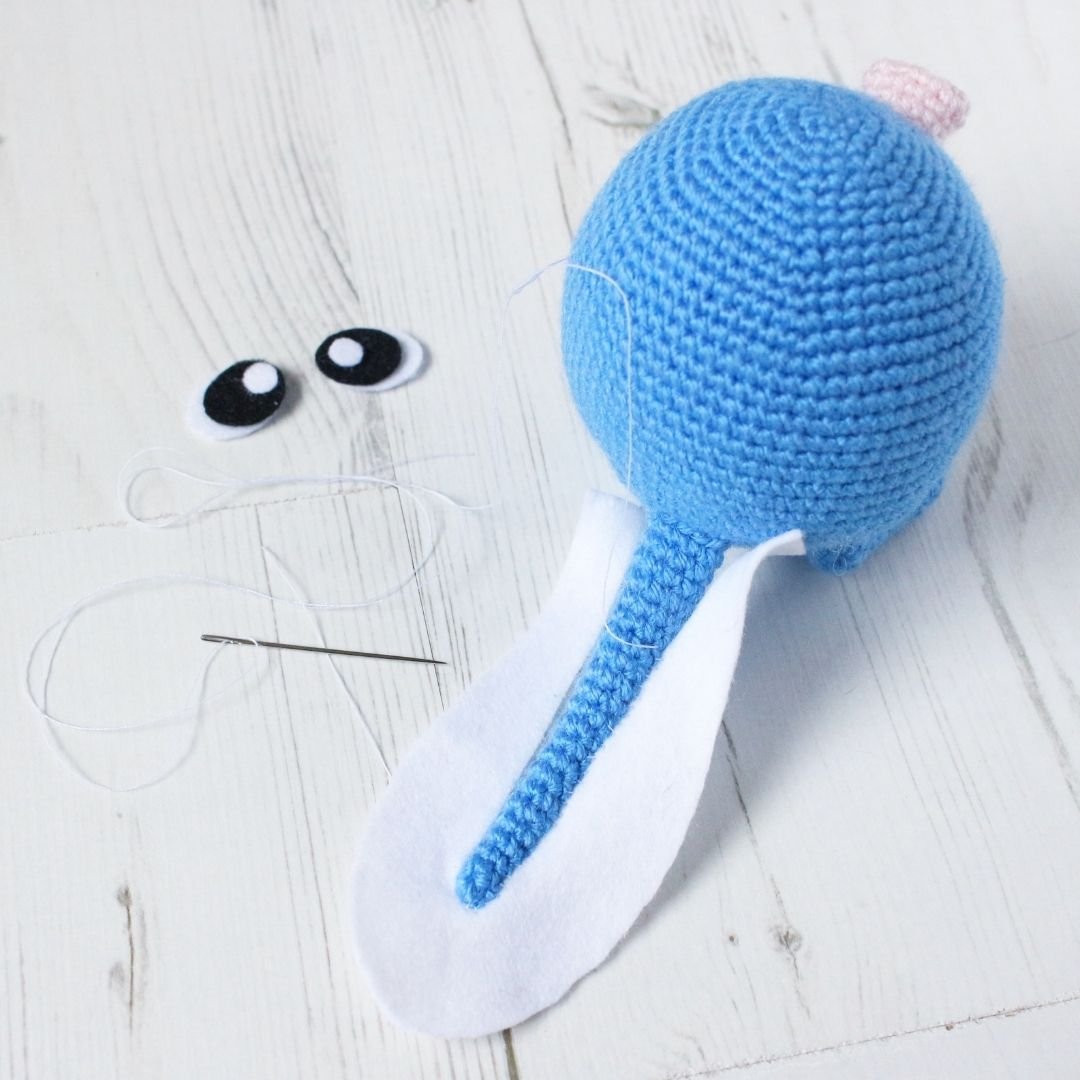
EYES
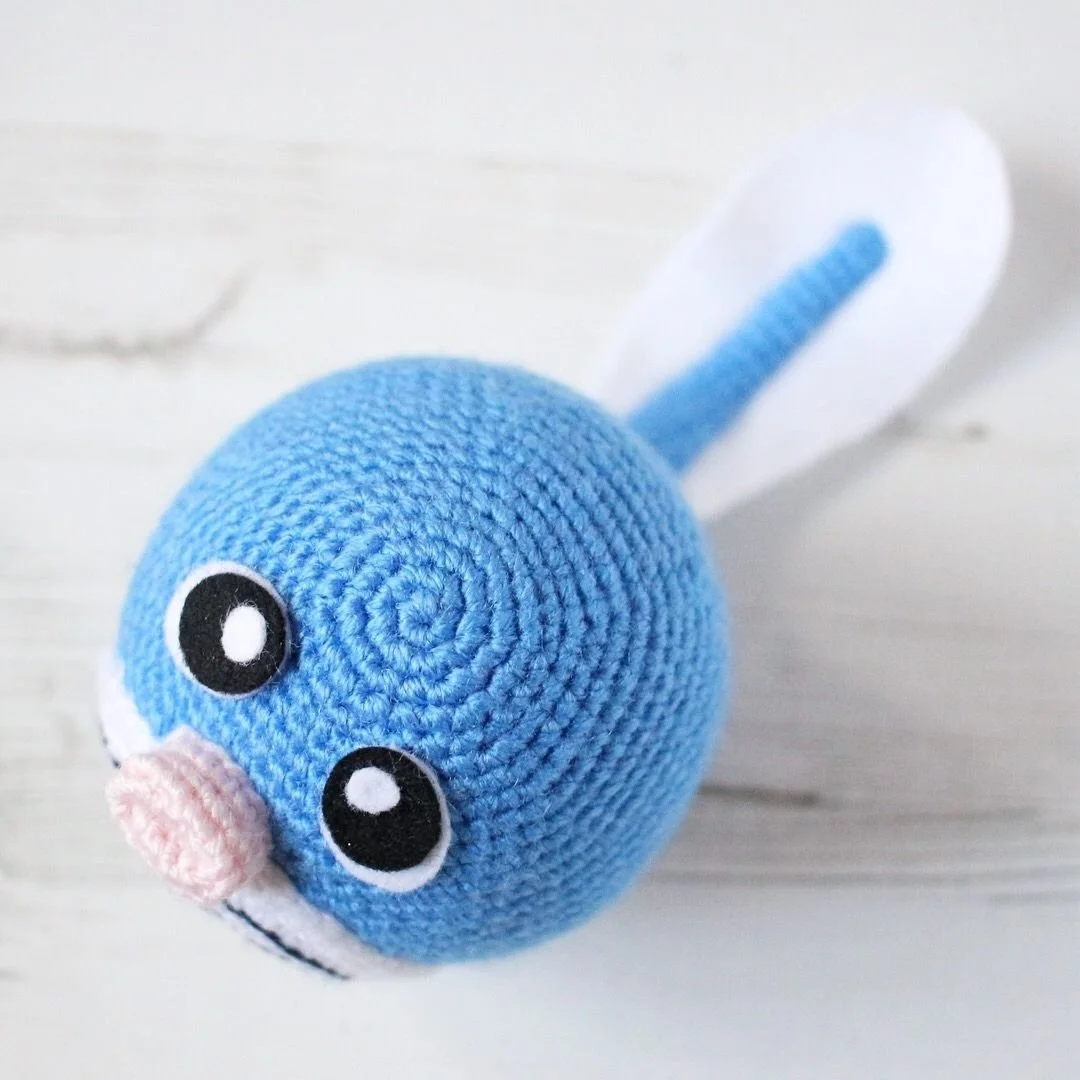
Use black and white felt to cut out eyes. Cut out two white oval pieces, two slightly smaller black round pieces, and two small white round pieces. Use a photo of Poliwag to get the right shapes and work out the correct placement of the eyes. Once all other body parts have been assembled glue the eyes on.
THANK YOU & ENJOY!
Please do not reprint, sell or claim the pattern as your own.
I’ve loved creating this pattern so please don’t forget to credit the pattern designer.
I would love to see your creations! Please remember to tag me in your social media posts and use the following hashtag #loopycathrineamigurumi
For any questions about the pattern, please comment below and I will do my best to help.